Desktop Window Manager (dwm.exe) is a window manager that is responsible for the Windows 10 and Windows 11 graphics effects like the Flip3D and the transparent windows or the live taskbar thumbnails.
It’s a regular process that you will find in the Windows Task Manager running smoothly most of the time.
However, sometimes, this can go wrong and start consuming too many resources, causing black screen errors or software crashes.
Here is what a user has to say about this issue on Reddit:
Windows Process, Desktop Window Manager uses incredible amounts of resources after a few hours of computer usage; causes black screens and software crashes.
The same issue occurs on Windows 11 occasionally, and having your PC lagging because of service can cause a lot of frustration, especially for people who are working from home and their life depends on being able to run their PC optimally.
It’s a serious matter and although it doesn’t have an official answer yet, another user points out that is caused by a recent Intel driver bug.
Why does Desktop Window Manager high CPU usage occur?
This issue is present on all versions of Windows, and many reported Dwm.exe Windows 11 issues on their PC. This includes both memory and CPU problems.
Speaking of which, many users reported CPU at 100% when nothing is running, and if this happens, it’s possible that you have a process in the background that is utilizing your resources.
Unfortunately, this is a somewhat common issue, and many experienced explorer.exe high CPU usage on their PCs. Luckily, there are ways to fix that issue.
How to fix the problem that cannot find drives when installing Windows 11/10
How can fix the Desktop Window Manager high memory use on Windows 10
1. Restart File Explorer from Task Manager
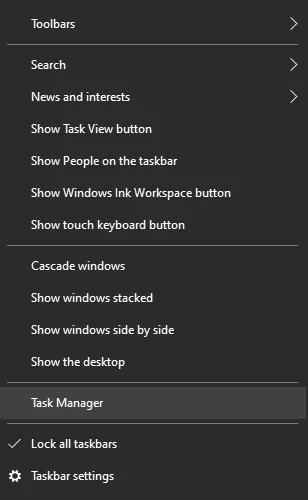
- Right-click an empty space on the taskbar and select Task Manager.
- Locate the Windows Explorer process and click on the Restart button from the lower right part of your screen.
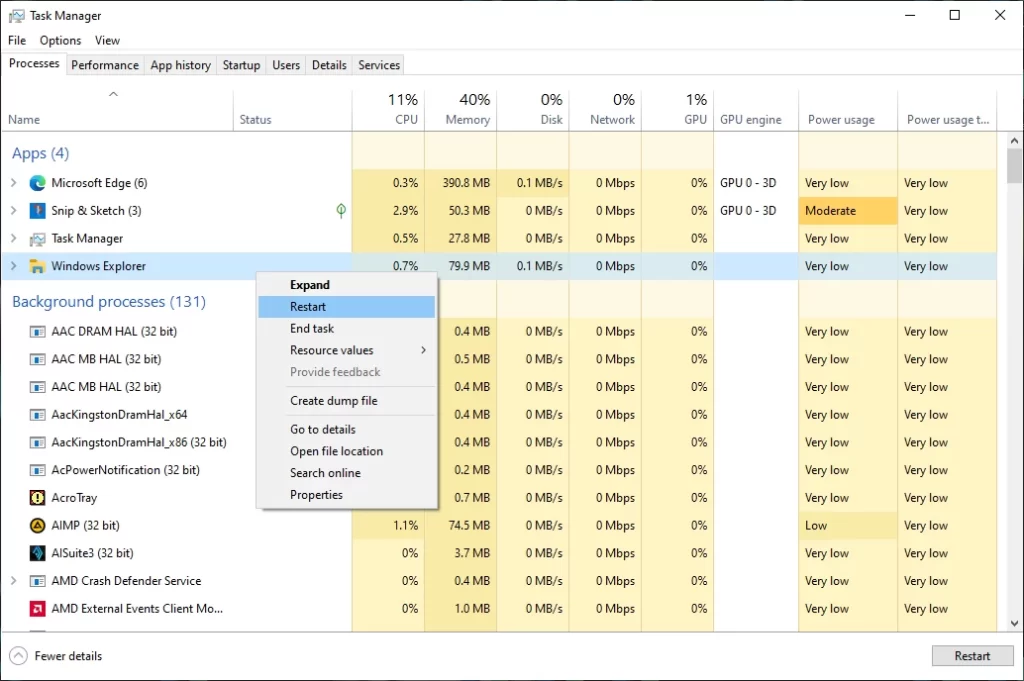
This is only a workaround described by one of the users who were confronted with the same problem but if it worked for him, it’s worth giving it a try.
2. Update or roll back the Intel graphics driver
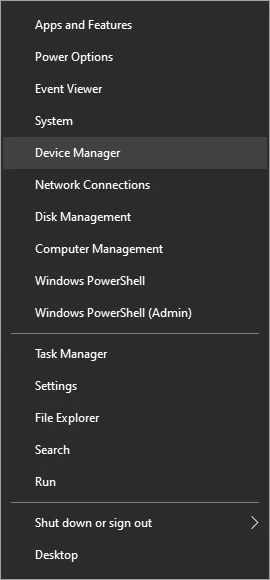
- Right-click the Start button and select Device Manager.
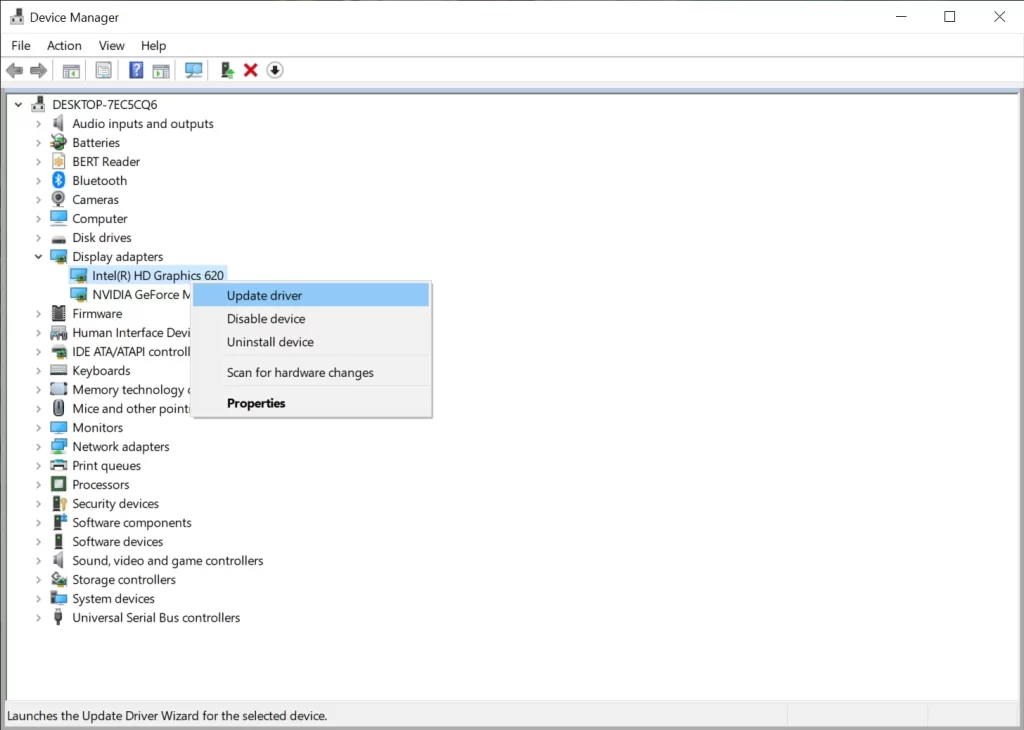
- Expand the Display adapter, right-click on your graphics driver, and select Update driver from the menu.
- Select the top option, Search automatically for drivers.
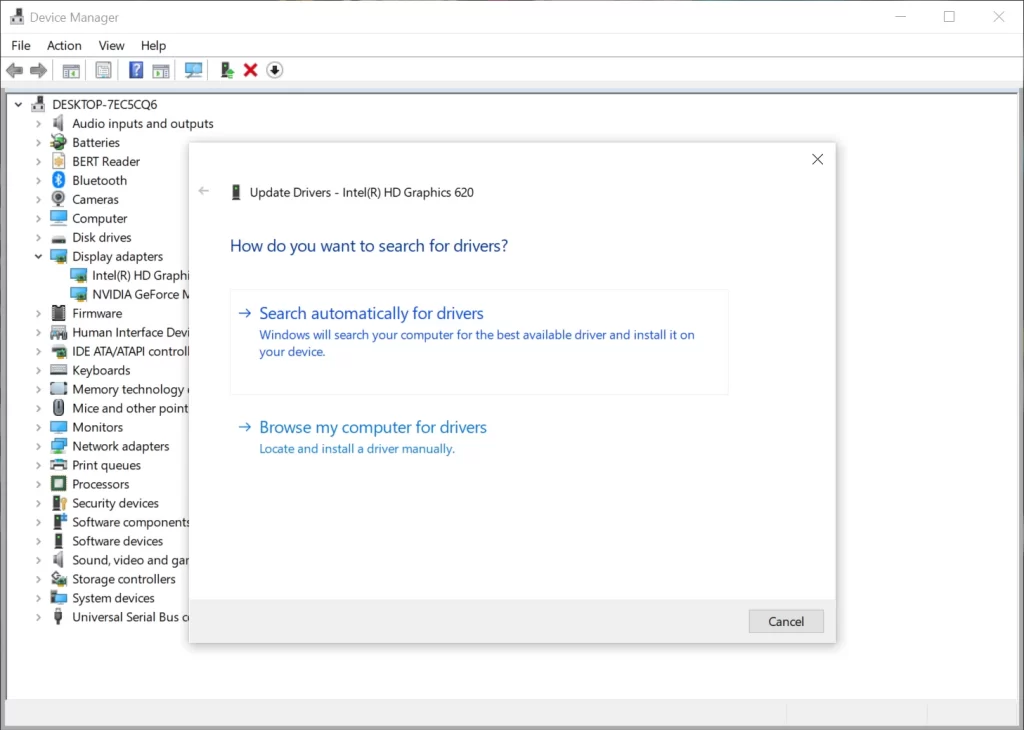
- If you get a message The best drivers for your device are already installed, you can also go to the manufacturer’s website and check if they have a new one for your GPU.
- You can also click on the Search for updated drivers on Windows Update option that will bring you to the Windows Updates section.
- Click on the Optional updates option and look for any driver updates.
We must mention that you have to be really careful when you decide to install drivers manually. If you mistakenly install a mismatched version you may cause more problems such as glitches, resolution issues, and other errors such as frequent BSODs.
To avoid these issues, we recommend you use an automated driver updater utility such as DriverFix. This lightweight tool uses a frequently updated driver database to find the perfect version for your hardware.
DriverFix is easy to use and you can set it up and let it run in the background. It can update, install and fix corrupt drivers both individually and in bulk.
3. Run a Full System Scan
- Click on Start and choose Settings.
- Go to Update & Security section.
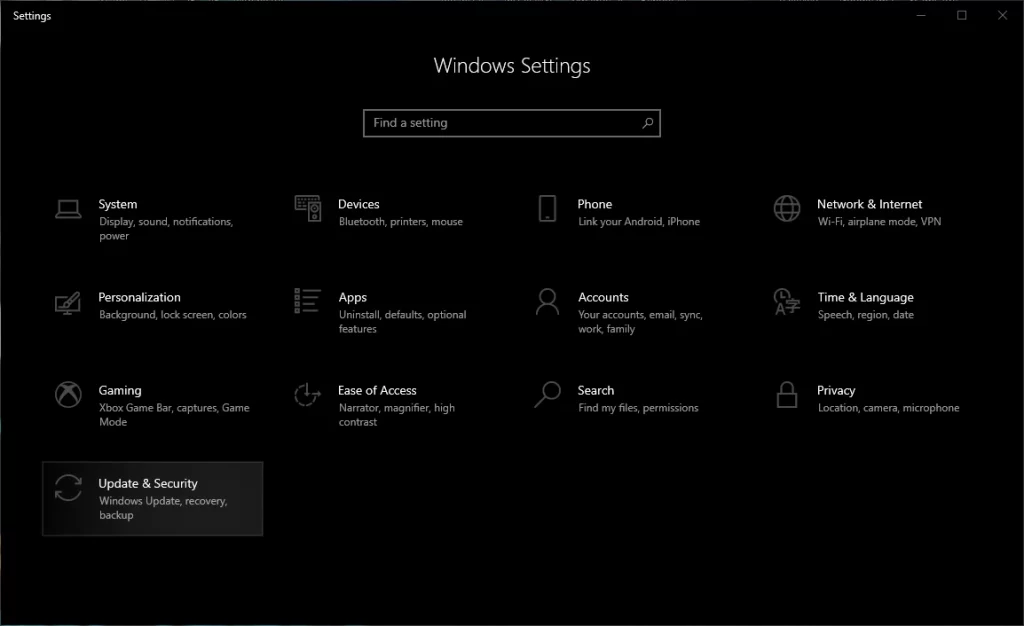
- Open the Windows Security tab, and click on Virus and Threat protection.
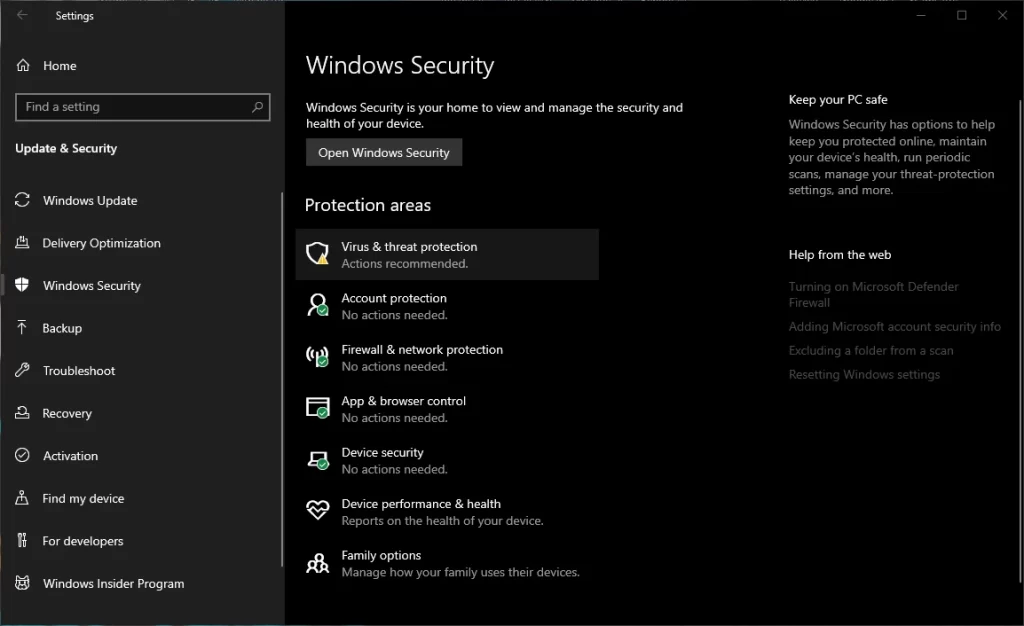
- Scroll down and select Scan Options.
- Choose Microsoft Defender Offline Scan, and click the Scan Now button.
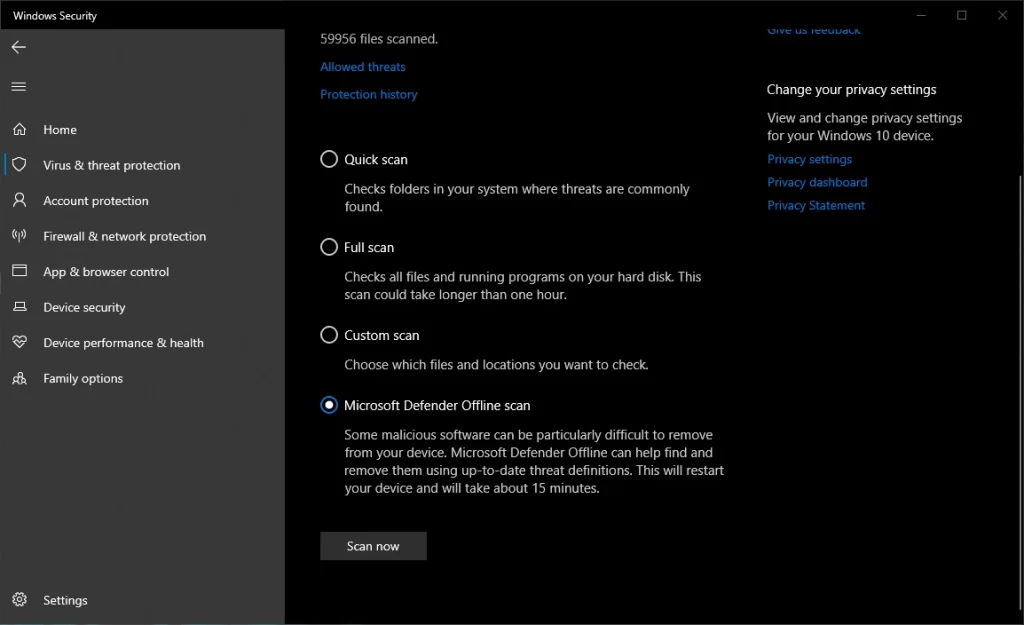
- Make sure you have saved your work and close all the open programs.
- Click the Scan button to restart your PC.
If you want more scanning options and potentially more accurate results, we recommend you use a third-party Windows-compatible antivirus.
While the built-in utility is very reliable, third-party solutions implement more features and detection technologies, making sure your machine is protected on all fronts.
Good third-party antiviruses generally use multi-layered protection paired with online security utilities such as VPNs and anti-tracking tools, as well as webcam protection, payment security, and more.
The Ultimate Guide to Installing Windows 11 from a USB drive
How can fix the Desktop Window Manager high memory use on Windows 11
1. Update Your Graphics Driver
- Press the keys Win + X and then Device Manager.
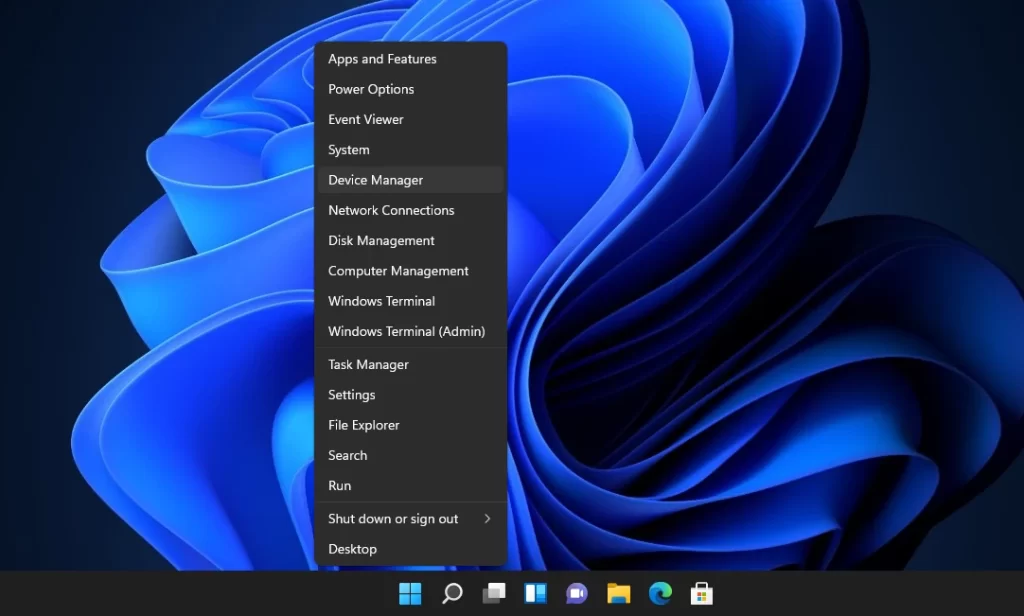
- Extend the Display Adapters section.
- Right-click your GPU and choose Update driver.
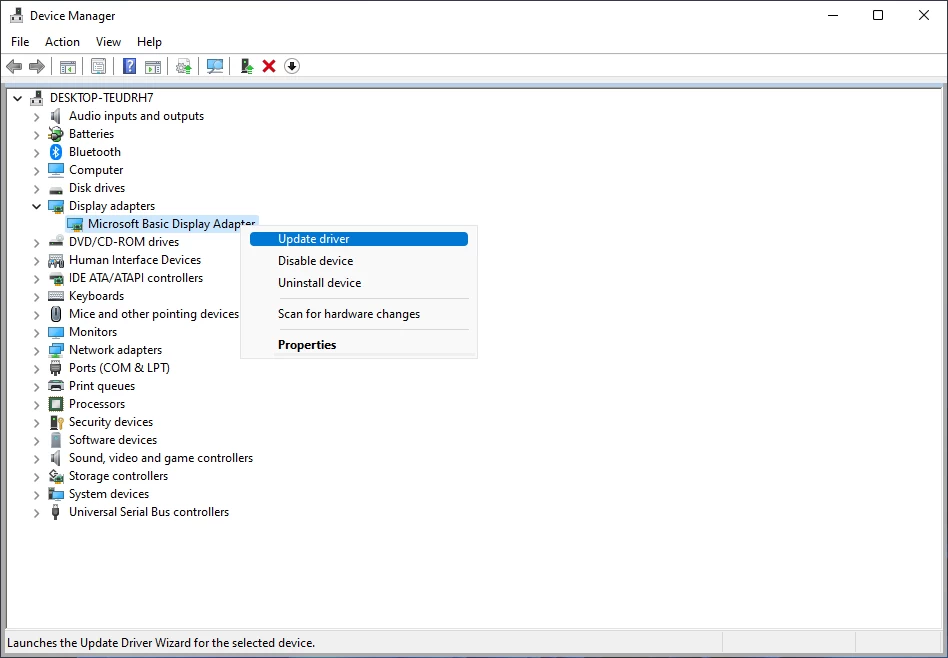
- Choose Search automatically for drivers.
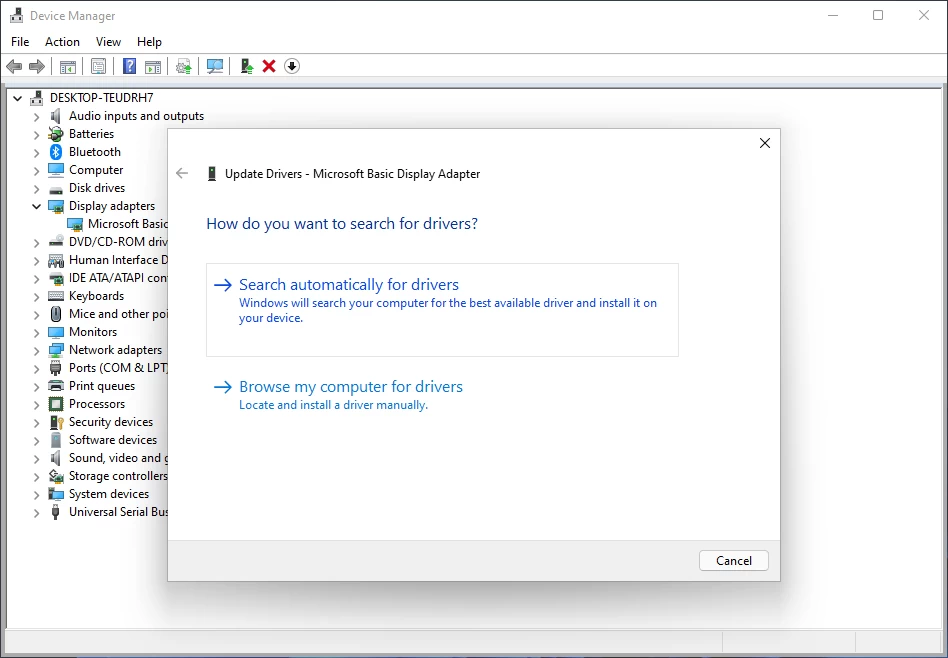
- Wait for the process to complete.
If the automated search for drivers doesn’t show any results, you could try out a useful driver updater software like DriverFix.
2. Modify the visual effects options
- Right-click This PC on your desktop, and choose Properties.
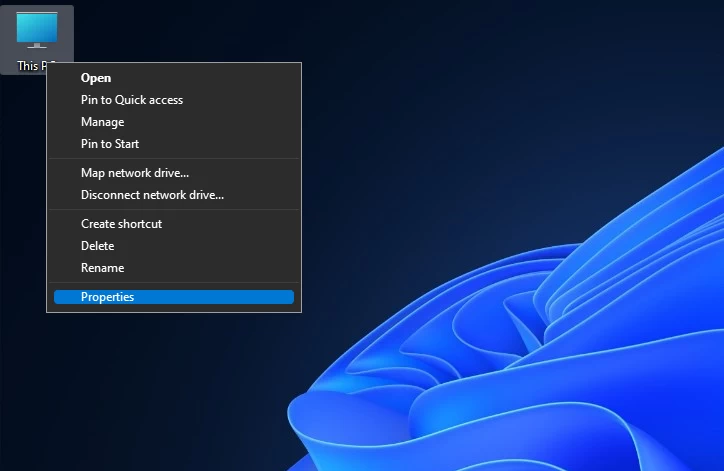
- Click Advanced system settings.
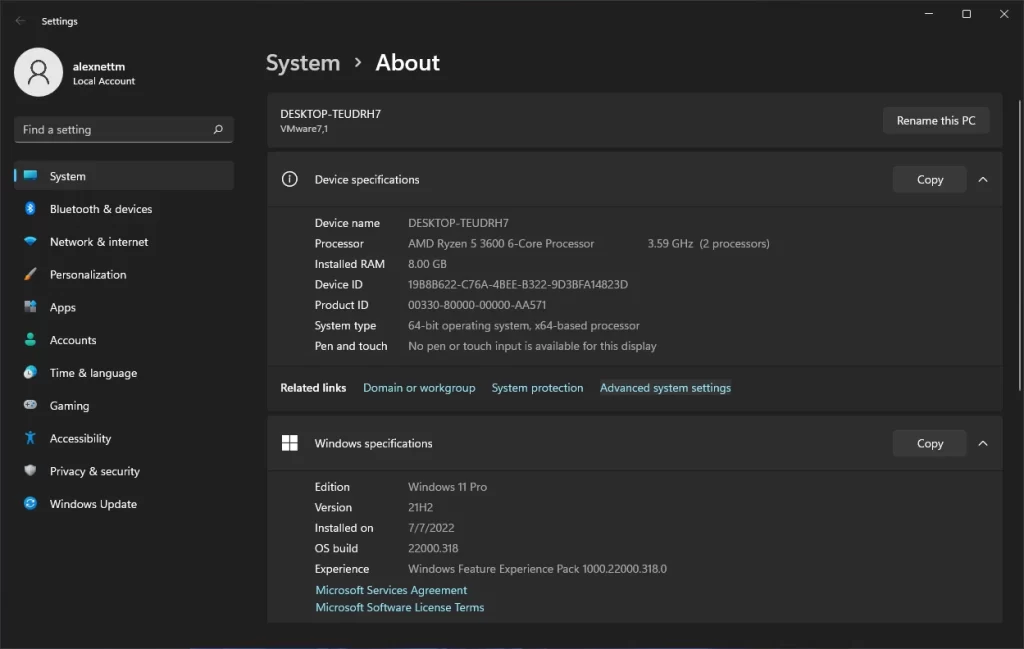
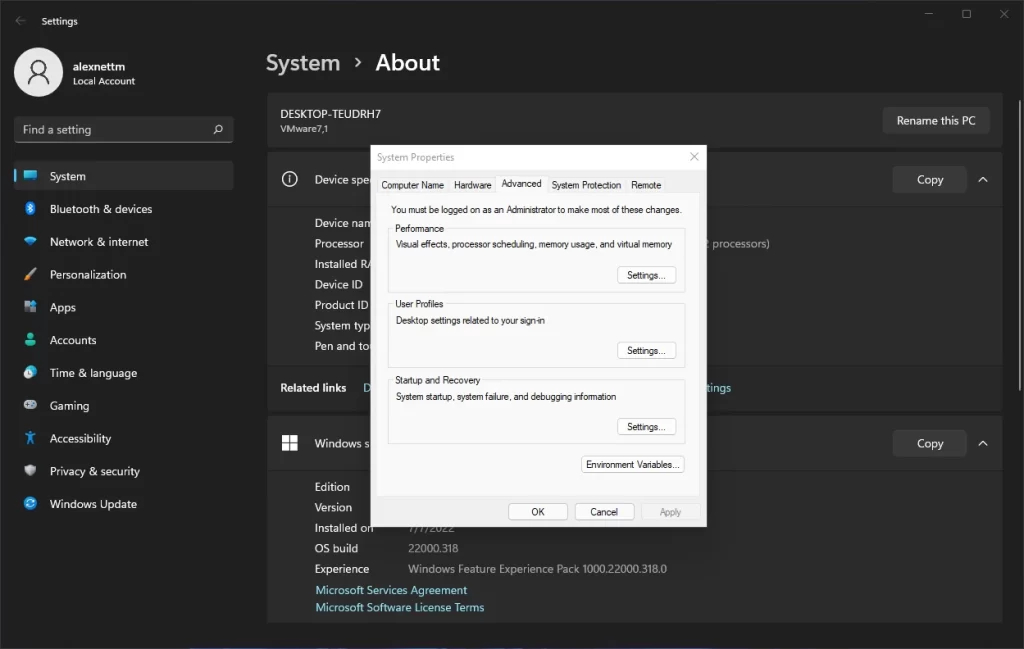
- In the Advanced tab, under Performance choose Settings.
- Click the Visual Effects tab, and select the Custom option.
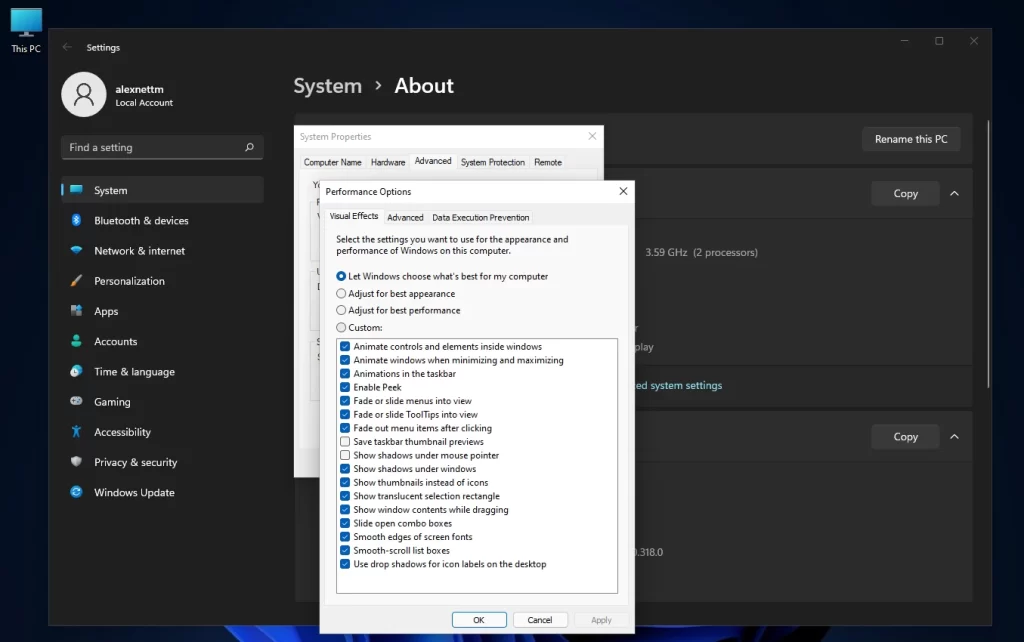
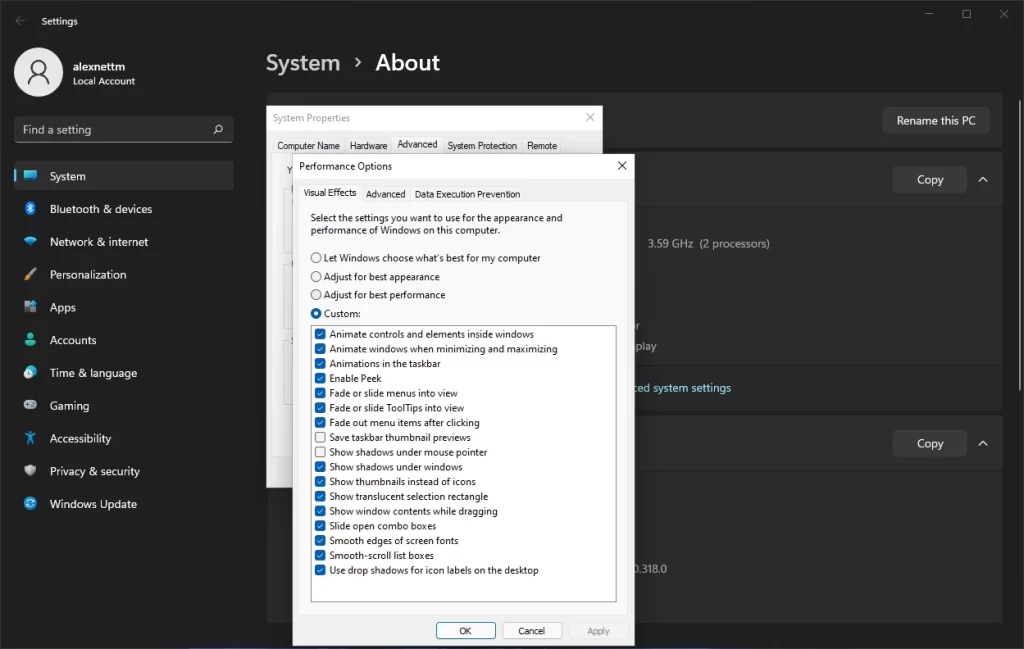
- Deactivate any visual effects that you don’t want.
Windows will shut down and perform an offline scan. Once done, the PC will automatically restart. Afterward, check if the Desktop Window Manager still consumes too many resources.
Hopefully, by applying these solutions you will be able to fix the Desktop Window Manager high memory issue.
Check out our comprehensive guide if Desktop Window Manager has stopped working and closed, and fix it in no time.
For any other viable solutions, leave them in the comments section, so everybody can benefit from that knowledge.
 Microsoft will change the default version of Teams on Windows this year
 Microsoft adds useful widgets to monitor your PC