Canonical has released much awaited Ubuntu 22.04 LTS desktop operating system on 21st April 2022. Code name for Ubuntu 22.04 is Jammy Jellyfish and it is a LTS (Long Term Support) release and will get updates and support for next 5 years.
This guide helps you install Ubuntu 22.04 LTS and outlines the new features.
Ubuntu 22.04 New Features
- New Logo – Ubuntu 22.04 comes with brand new ubuntu logo.
- Dock Mode Improvements – This release added new functionality to dock that we can change the size of dock.
- Liberty to change theme Colors – It allows you to change the default orange theme and personalize desktop experience.
- Introduction to new screenshot and screencast tool – As GNOME 42 is introduced in Ubuntu 22.04, it has a new screenshot and screencast tool by default.
- Introduction to new flutter based installer – Ubuntu 22.04 LTS comes with flutter based installer which allows you to choose ZFS and LVM while installing Ubuntu on your system.
- New Grub (Boot loader) 2.06 – By default, OS prober feature is disabled in Grub 2.06. You need to enable it if you are planning to have dual boot system.
- Slight Improvement in software Center.
- Allow to configure multi-monitor settings.
- New Linux Kernel 5.15.
- New version of Software like openssl 3.0, Python 3.10, GCC 11 and PHP 8.1.
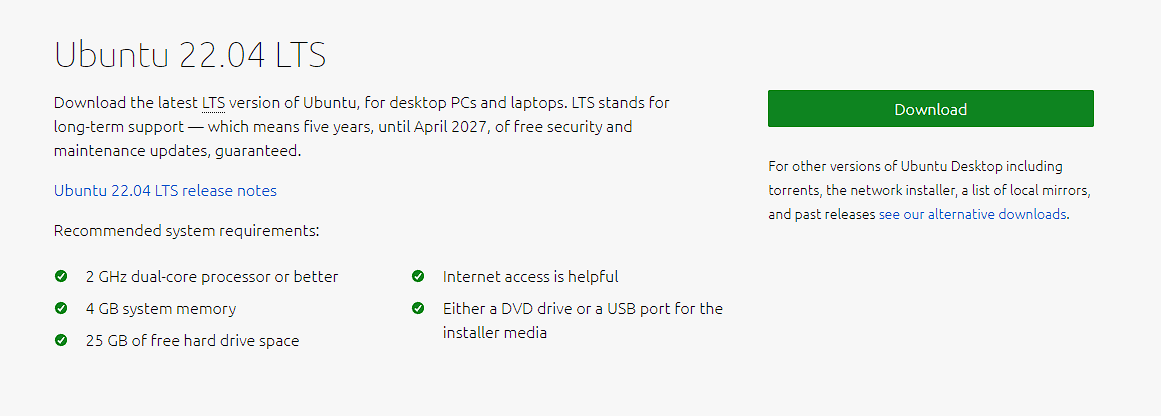
Recommended system requirements
- 2 GHz dual-core processor or better
- 4 GB system memory
- 25 GB of free hard drive space
- Bootable Installation Media
- Stable Connection (Optional)
1. Download Ubuntu 22.04 LTS ISO File
Download Ubuntu 22.04 LTS iso file from the ubuntu official web portal. Use beneath URL: Ubuntu 22.04 – Jammy Jellyfish
2. Create Bootable USB
To create a bootable USB drive, use a stick with at least 4GB of space. Back up any existing data as the process deletes all the data from the device.
2.1 Make a Bootable USB Drive on Ubuntu
To make a bootable USB drive, use the Startup Disk Creator tool:
1. In the Show Applications search dialog, type Startup Disk Creator.
If the tool is not installed, the Software Center offers the option to install it.
2. In the top pane, click Other. Browse and select the Ubuntu 22.04[.]iso file.
3. In the bottom pane, select your USB drive.
4. Click Make Startup disk.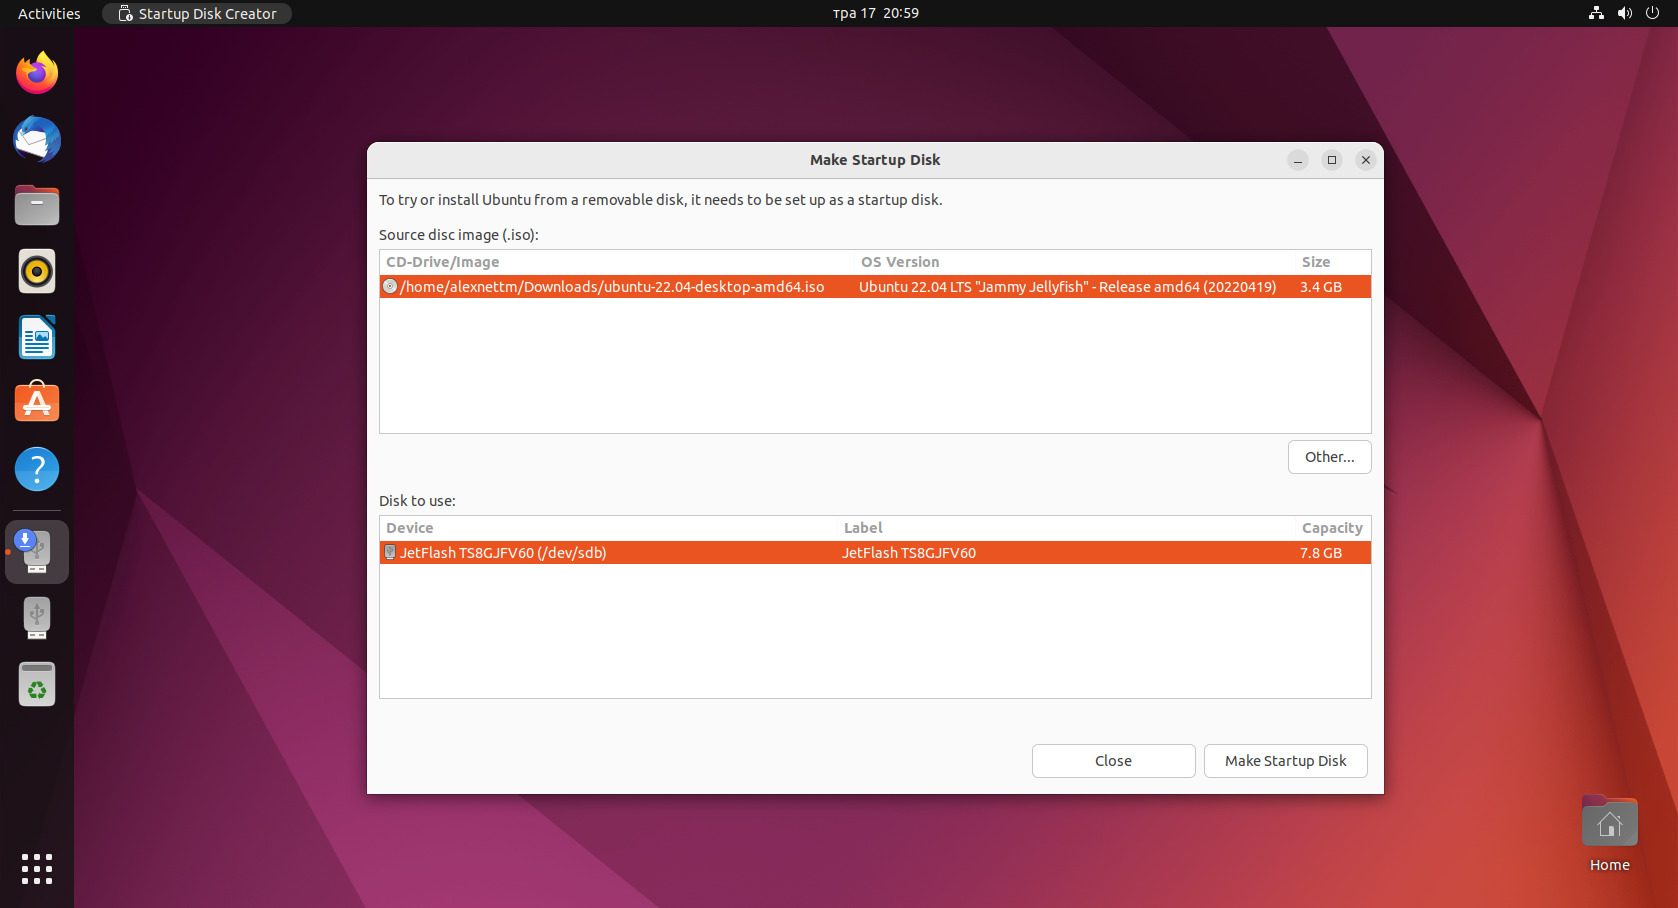
2.2 Make a Bootable USB Drive on Windows
Install the third-party tool Rufus to create a bootable USB drive on Windows.
1. Download the Rufus utility to create the bootable drive. Scroll to the Download section and click the link to download the latest version of Rufus.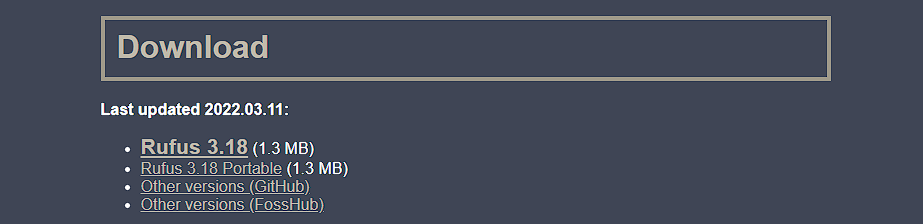 2. Run the file when the download completes.
3. A pop-up dialog opens. Select No when prompted to check for online updates. The Rufus utility launches.
4. Insert the USB drive. The tool automatically recognizes the device.
- Set the USB device in the drop-down menu.
- Under Boot Selection, click Disk or ISO Image.
- Click the SELECT button to the right.
- Locate the Ubuntu 22.04[.]iso file.
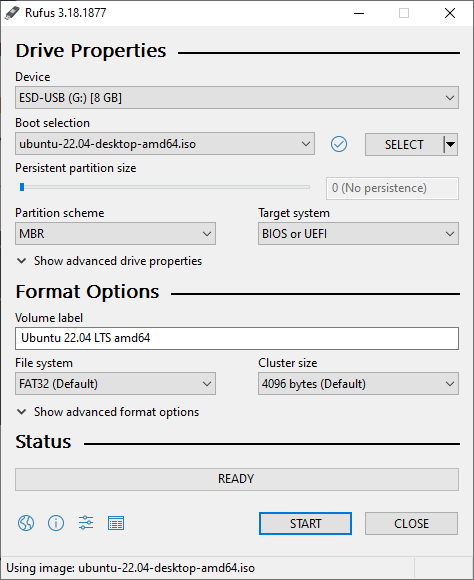
5. Click START to begin the formatting process. Wait for the formatting to finish and exit Rufus.
3. Boot System with Bootable Installation Media
To boot up Ubuntu from the USB device, do the following:
1. Turn off your machine. Remove any unnecessary USB and external devices.
2. Insert the Ubuntu USB drive and turn on the machine. If the computer boots the USB drive automatically, skip the next step. Otherwise, select the USB boot device manually in the Boot Menu or BIOS/UEFI.
3. To the boot menu, tap the boot key as soon as the computer turns on. The key differs based on the manufacturer:
| Manufacturer | Boot Key |
|---|---|
| Acer | F9, F12, or Esc |
| Asus | F8 or Esc |
| Compaq | F9 or Esc |
| eMachines | F12 |
| Fujitsu | F12 |
| HP | F9 or Esc |
| Lenovo | F8, F10, or F12 |
| Samsung | F2, F12, or Esc |
| Toshiba | F12 |
When the boot menu appears, use the arrow keys to pick the Ubuntu USB boot device. The system starts loading the Ubuntu live disc menu.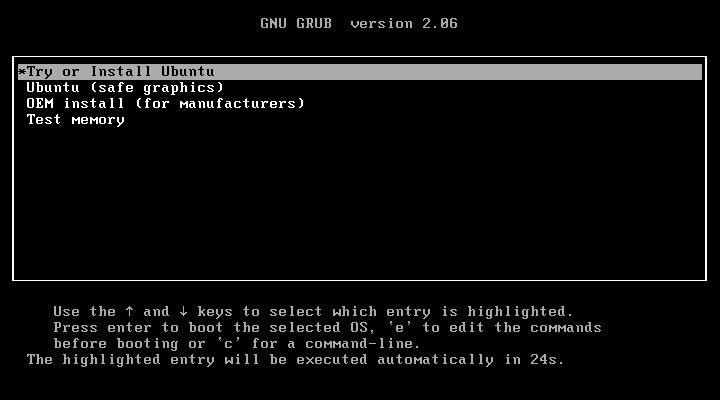
4. Install Ubuntu 22.04 LTS Desktop
On the next screen, click on Install Ubuntu.
4.1 Choose Keyboard Layout
The system selects the English (US) keyboard layout by default.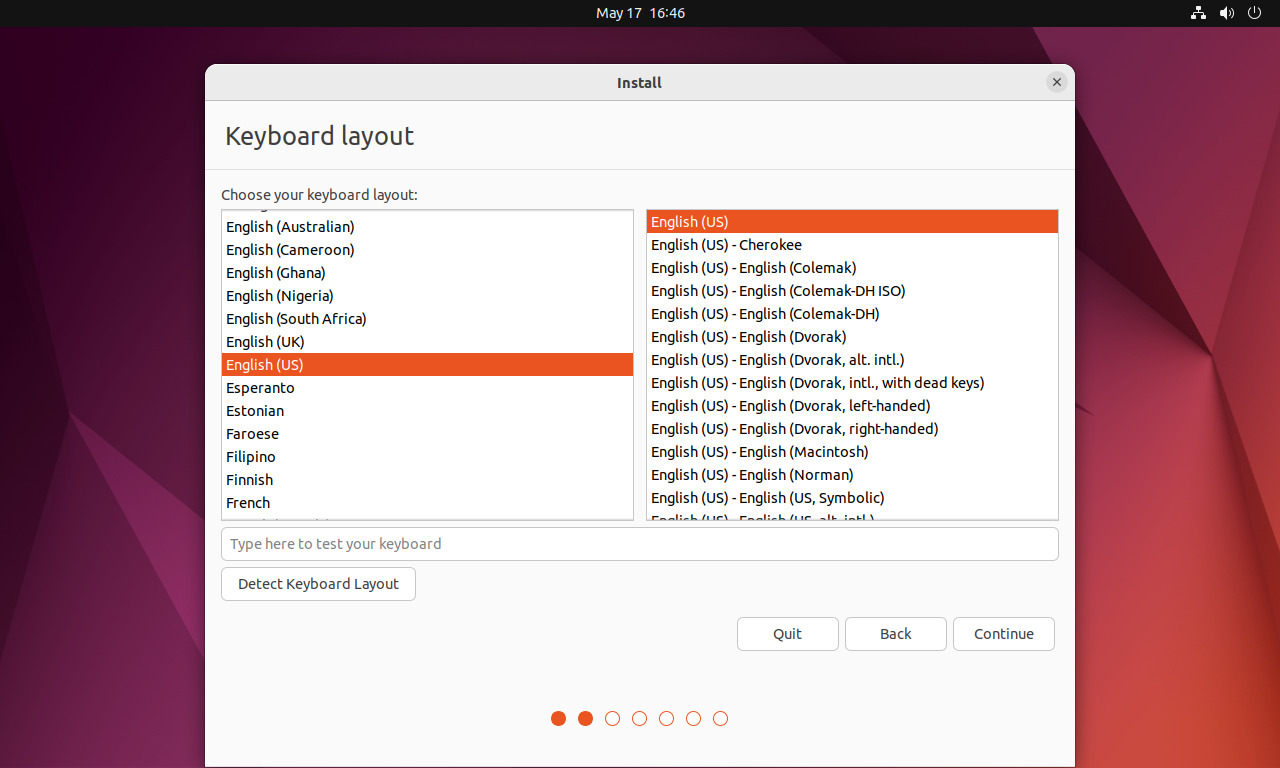
4.2 Choose Updates and Starting Applications
Choose the starting applications:
- Normal Installation includes media players and productivity software from the start.
- Minimal Installation includes only the essential utilities.
Next, choose update and third party options:
- Download updates while installing Ubuntu – Downloads update packages during the installation process, saving time after installation.
- Install third-party software – If any proprietary software or hardware requires drivers or the drivers don’t have an open-source alternative, choose this option.
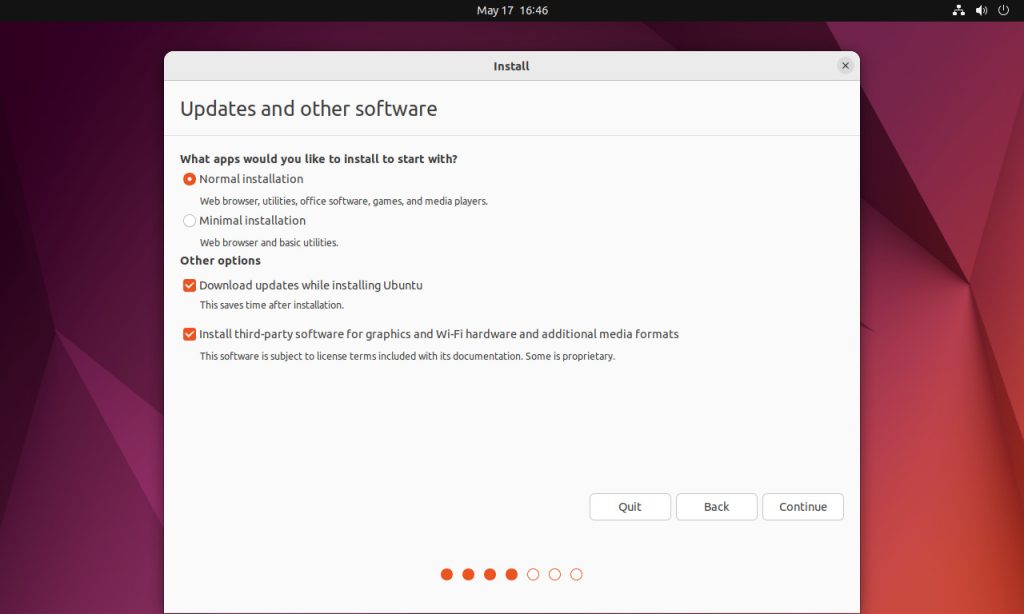

Click on Continue to proceed further.
5. Choose Installation Type
1. To do a clean install, click Erase disk and install Ubuntu. Click Install Now and continue to the Set Time Zone step.
2. For more advanced users, Advanced features allow choosing drive management, file system, and encryption options:
- Use LVM with the new Ubuntu installation – LVM (Logical Volume Management) is a tool for dynamic virtual drive management.
- Erase disk and use ZFS – ZFS (Zettabyte File System) is a combined logical volume management and file system. It’s an excellent option for servers with lots of RAM, CPU, and disks.
- Encrypt the new Ubuntu installation for security – The option encrypts the drive’s contents. Choose the security key in the next step to decrypt and use the disk.
When ready, click Install Now and continue the installation process.
3. To create or resize your disk partitions, select Something else and click Continue. A new dialog opens, which lets you create a partition table and logical drives. The following section outlines how to partition the disk.
5.1 Creating Disk Partitions (Optional)
The operating system sees different partitions as individual drives. It’s good practice to create separate partitions for various OS functions. Partition the disk during installation or at a later point.
The menu shows the disk as /dev/sda. Click New Partition Table and press Continue.
The table displays the available space on the disk. Double-click free space to start creating partitions.
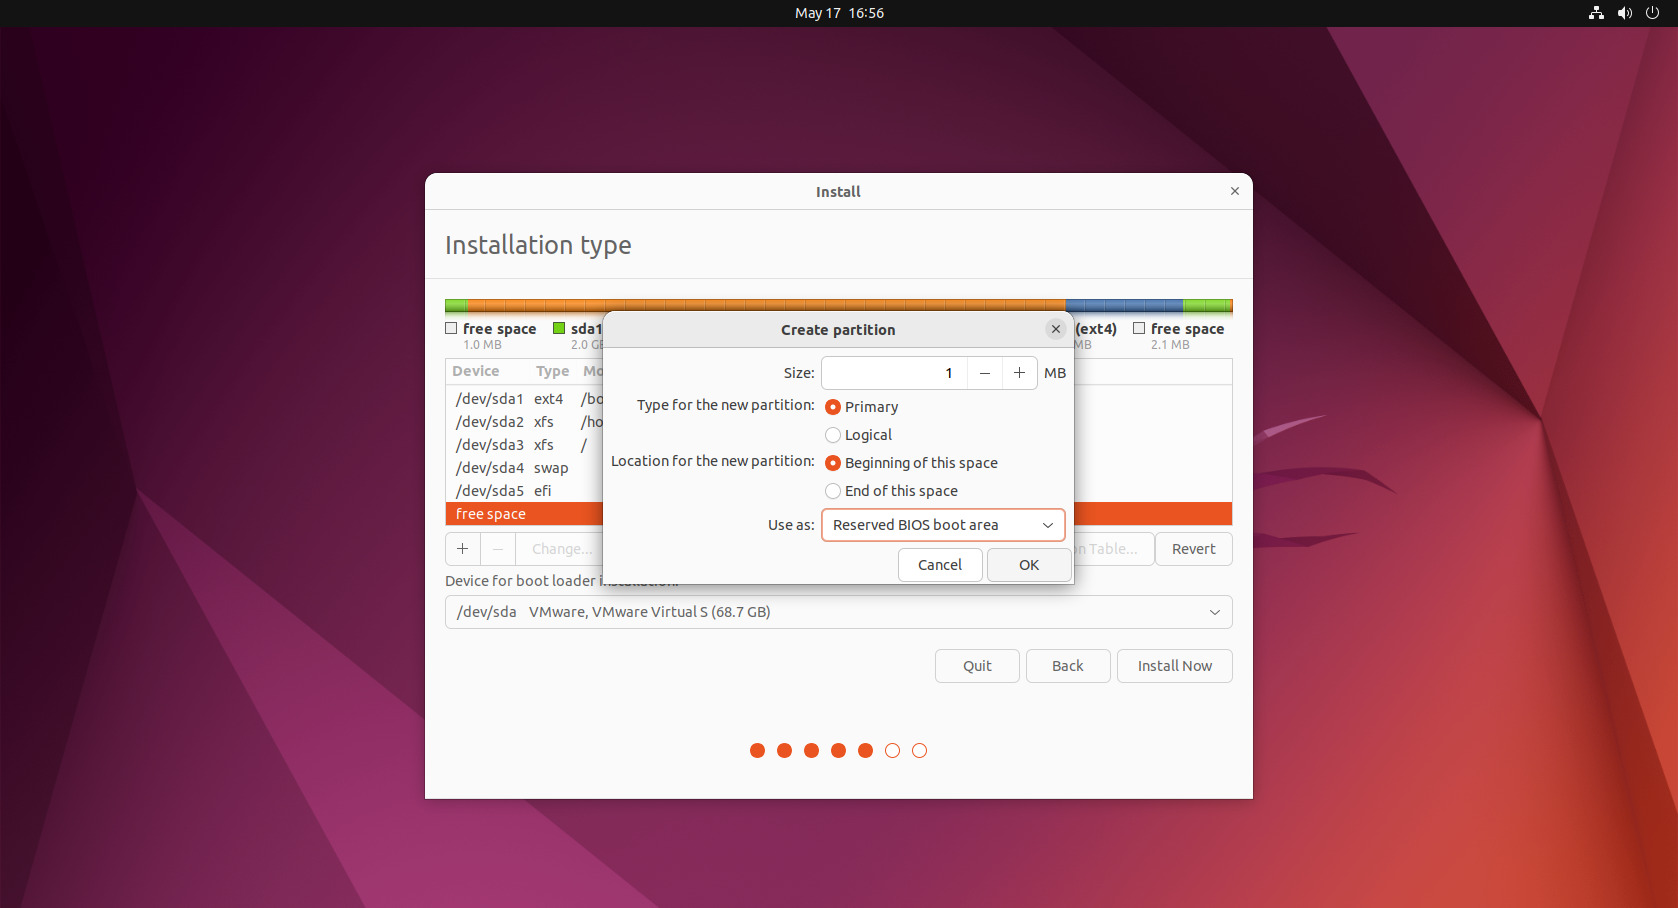
1. Now Create our first partition as /boot of size 2GB. Select the Free Space –> Click on + symbol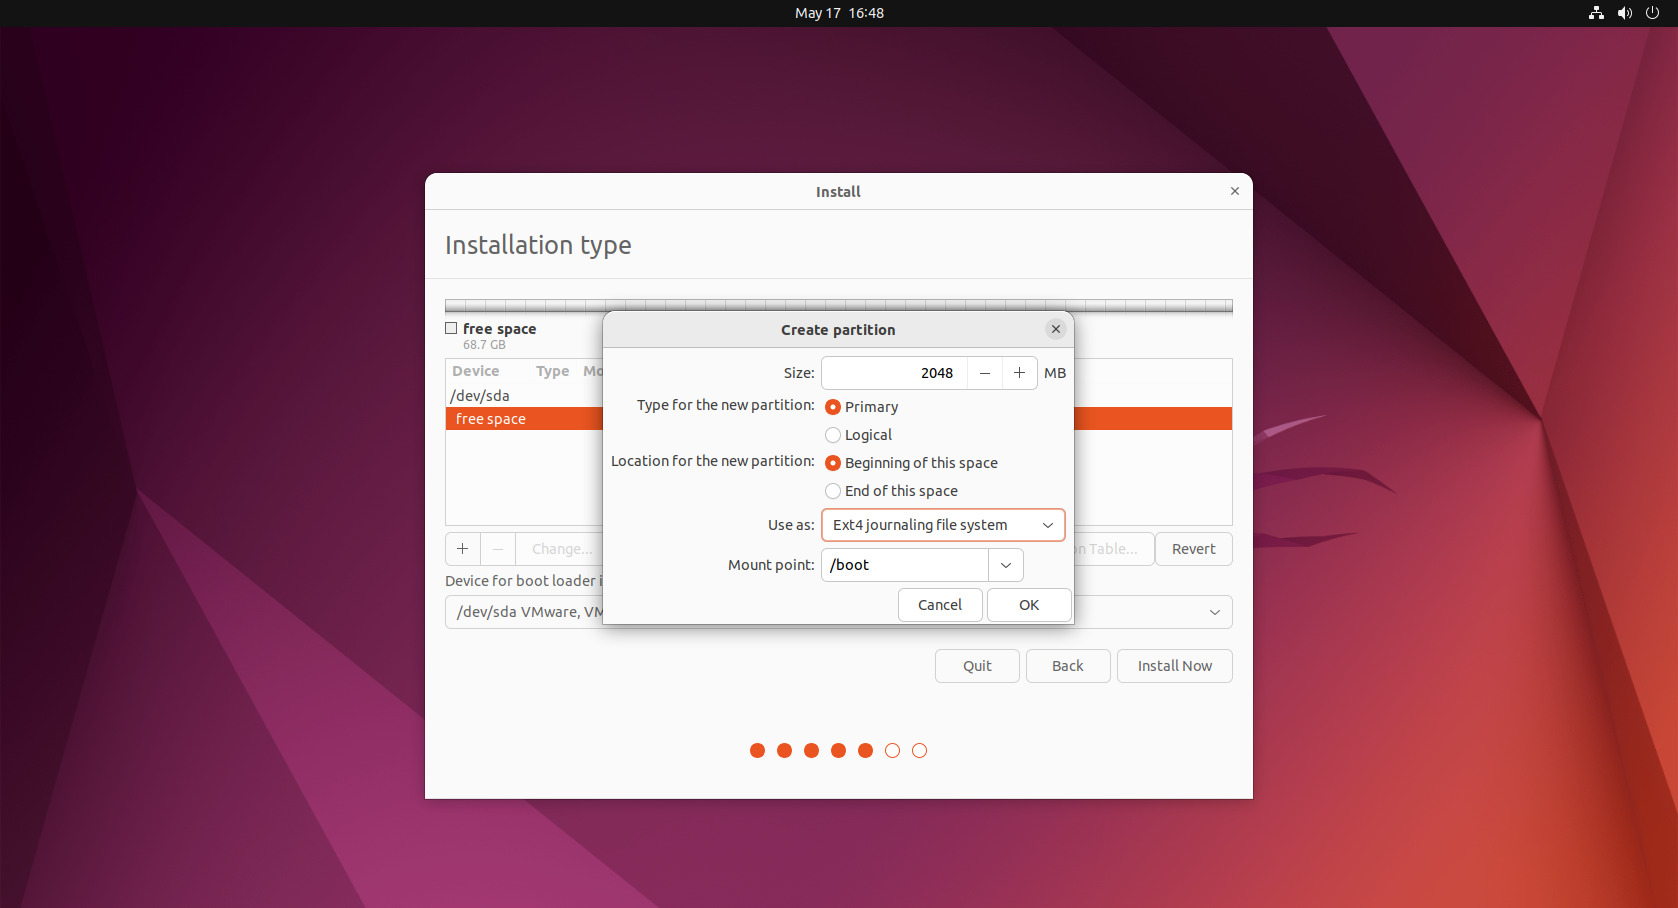
2. Make a partition for the user file system. The /home directory contains all the user’s documents, images, and videos. When reinstalling Ubuntu, this helps preserve the local files.
- Set the size to the remaining free space (leave as is).
- Set the partition type to Primary.
- Leave the location to Beginning of this space.
- Choose XFS journaling file system and set the mount point to
/homedirectory. - Click OK to complete.


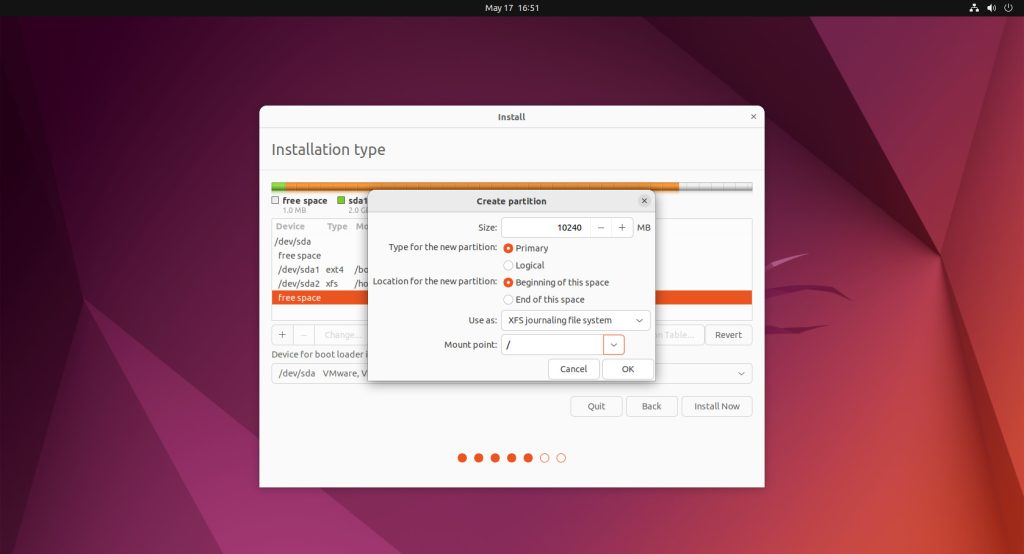
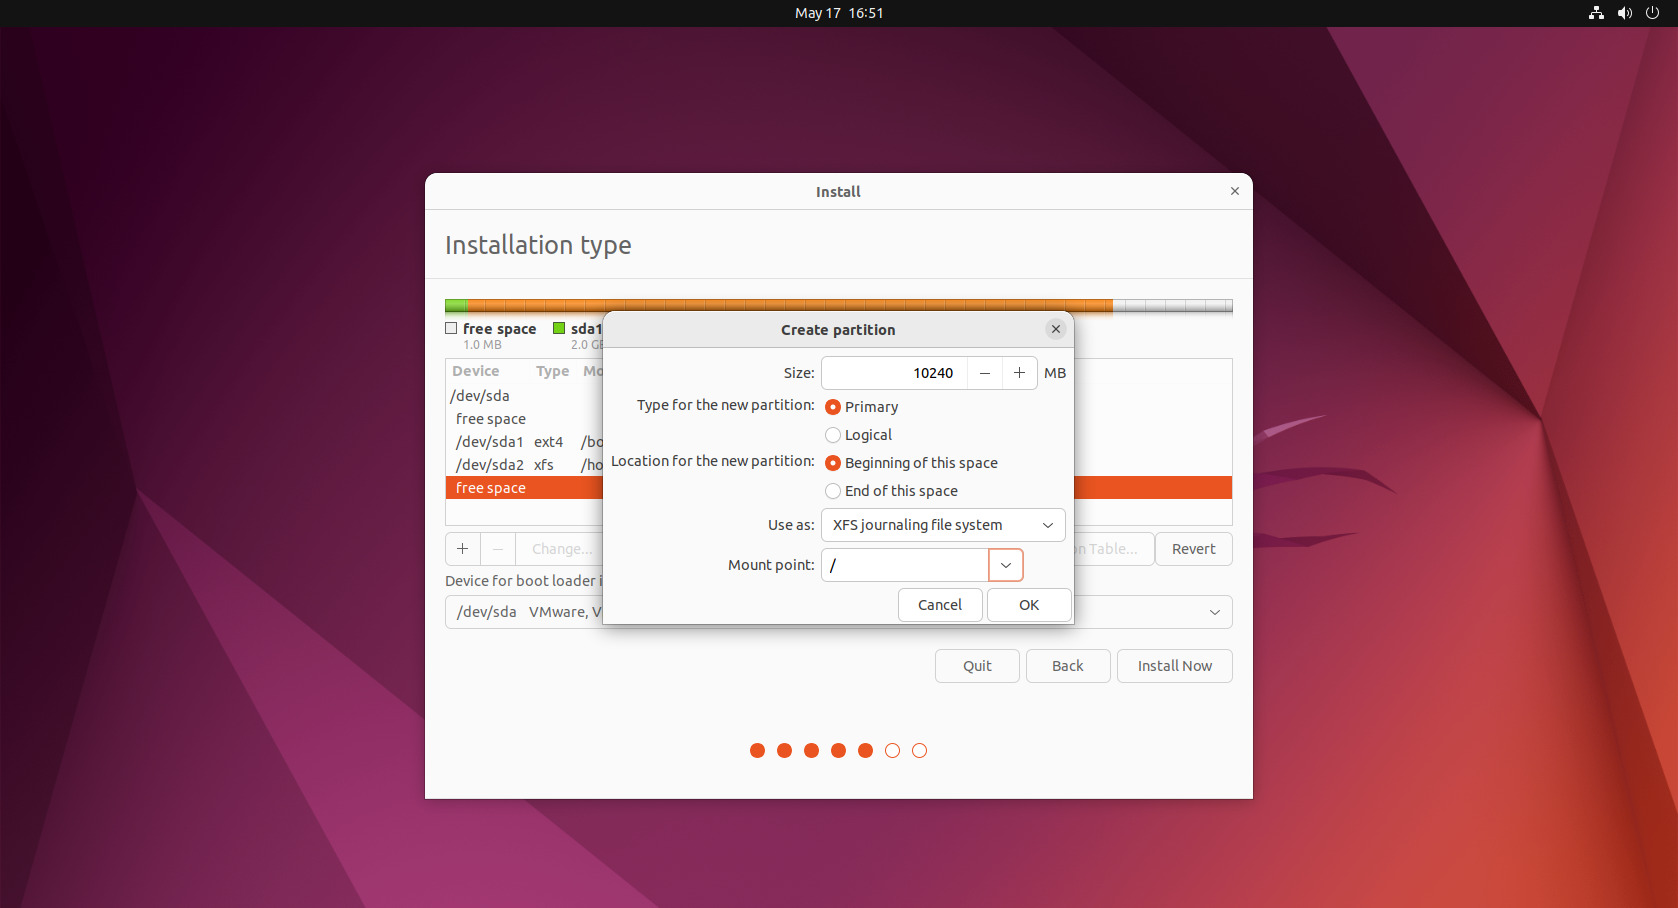
3. Create a partition for the root file system.
- The size should be 10-20GB.
- Set the partition type to Primary.
- Leave the location to Beginning of this space.
- Choose XFS journaling file system and set the mount point to
/directory. - Click OK to complete.
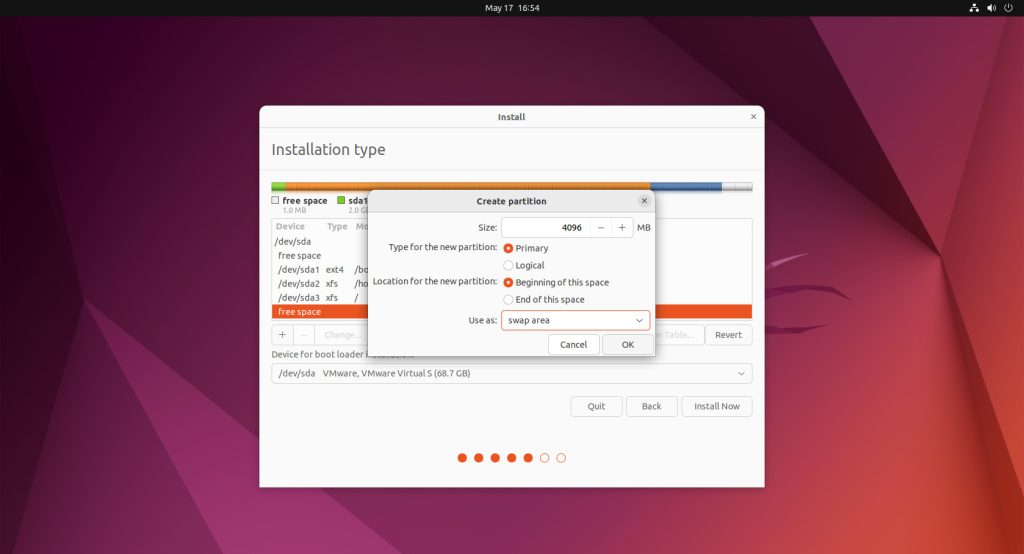
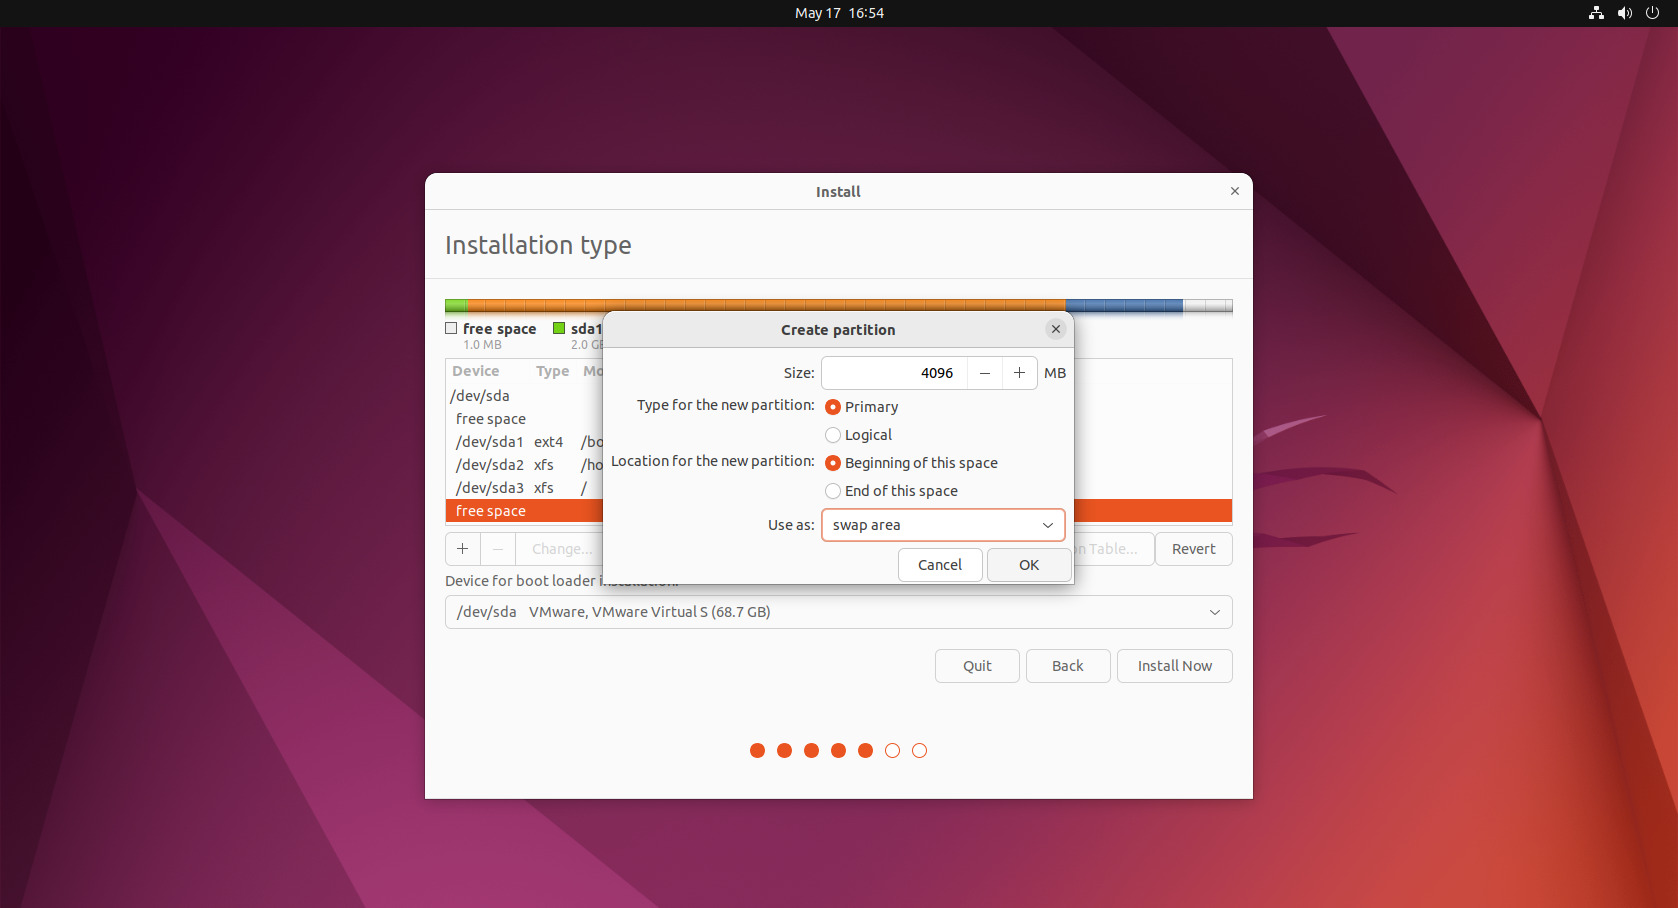
4. Create a swap partition. Swap space activates when RAM fills up and requires additional space. Additionally, swap space is used for hibernation mode, allowing you to save the machine state and resume it when turning it on again.
- For 4GB RAM, set the size to 4096MB.
- Set the partition type to Primary.
- Leave the location to Beginning of this space.
- Choose swap area from the drop-down menu.
- Click OK to complete.
5. EFI System Partition 100 – 250 MB

6. Reserved Bios boot area 1MB
Once you are done with partition scheme, click on Install Now option in following screen to further proceed with installation.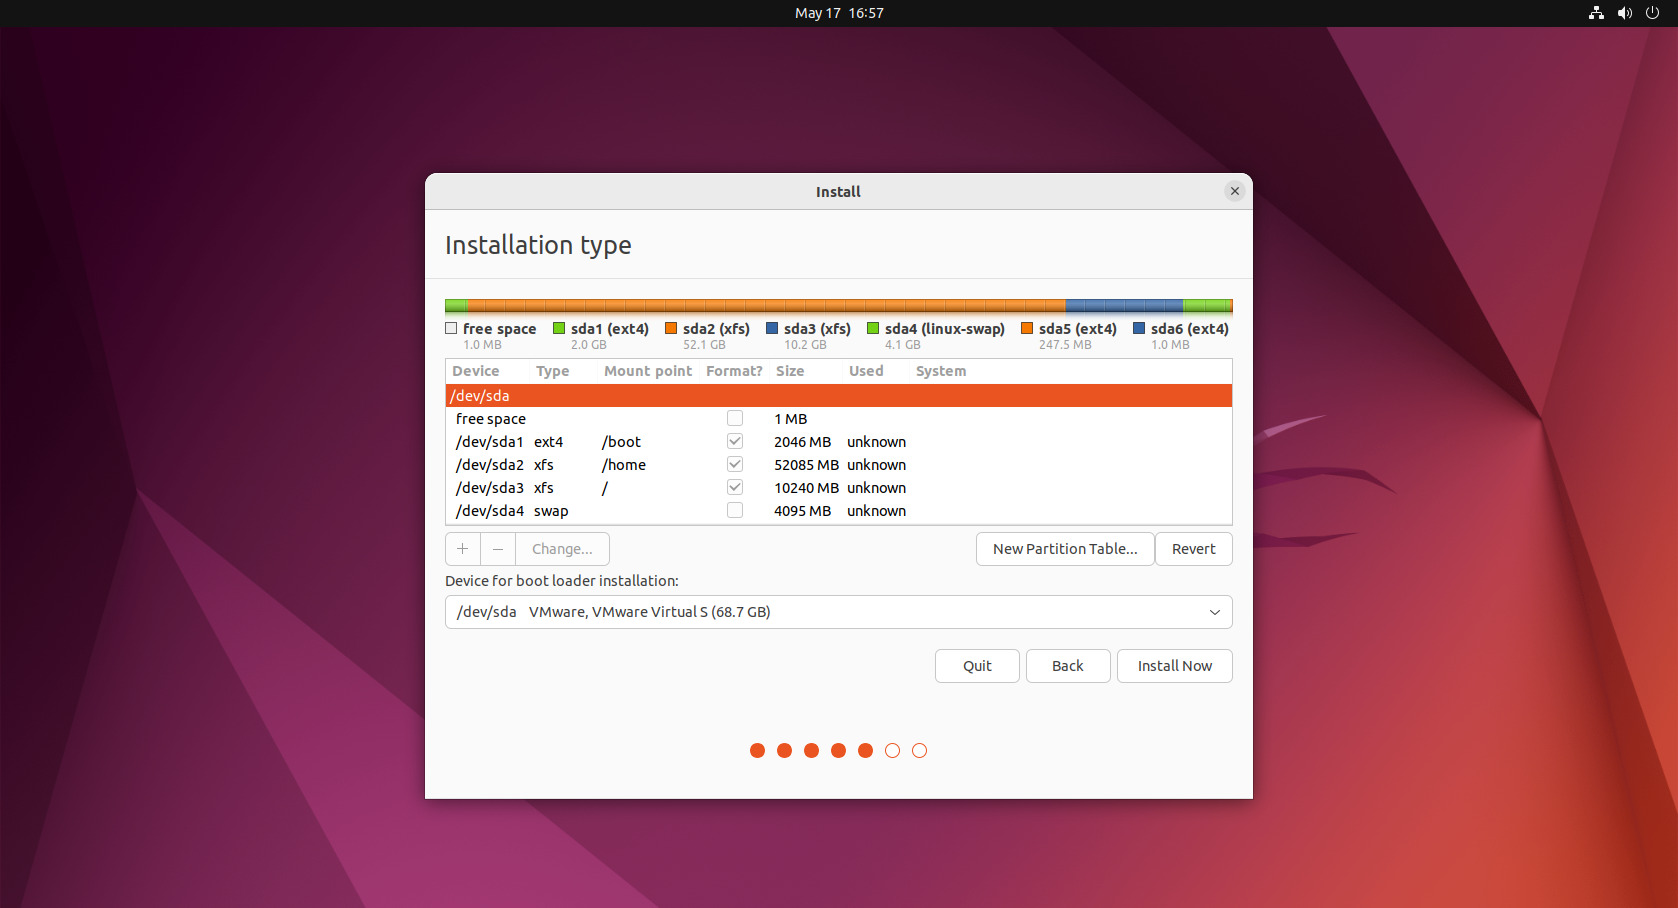
In the next screen, choose Continue to write changes to the disk.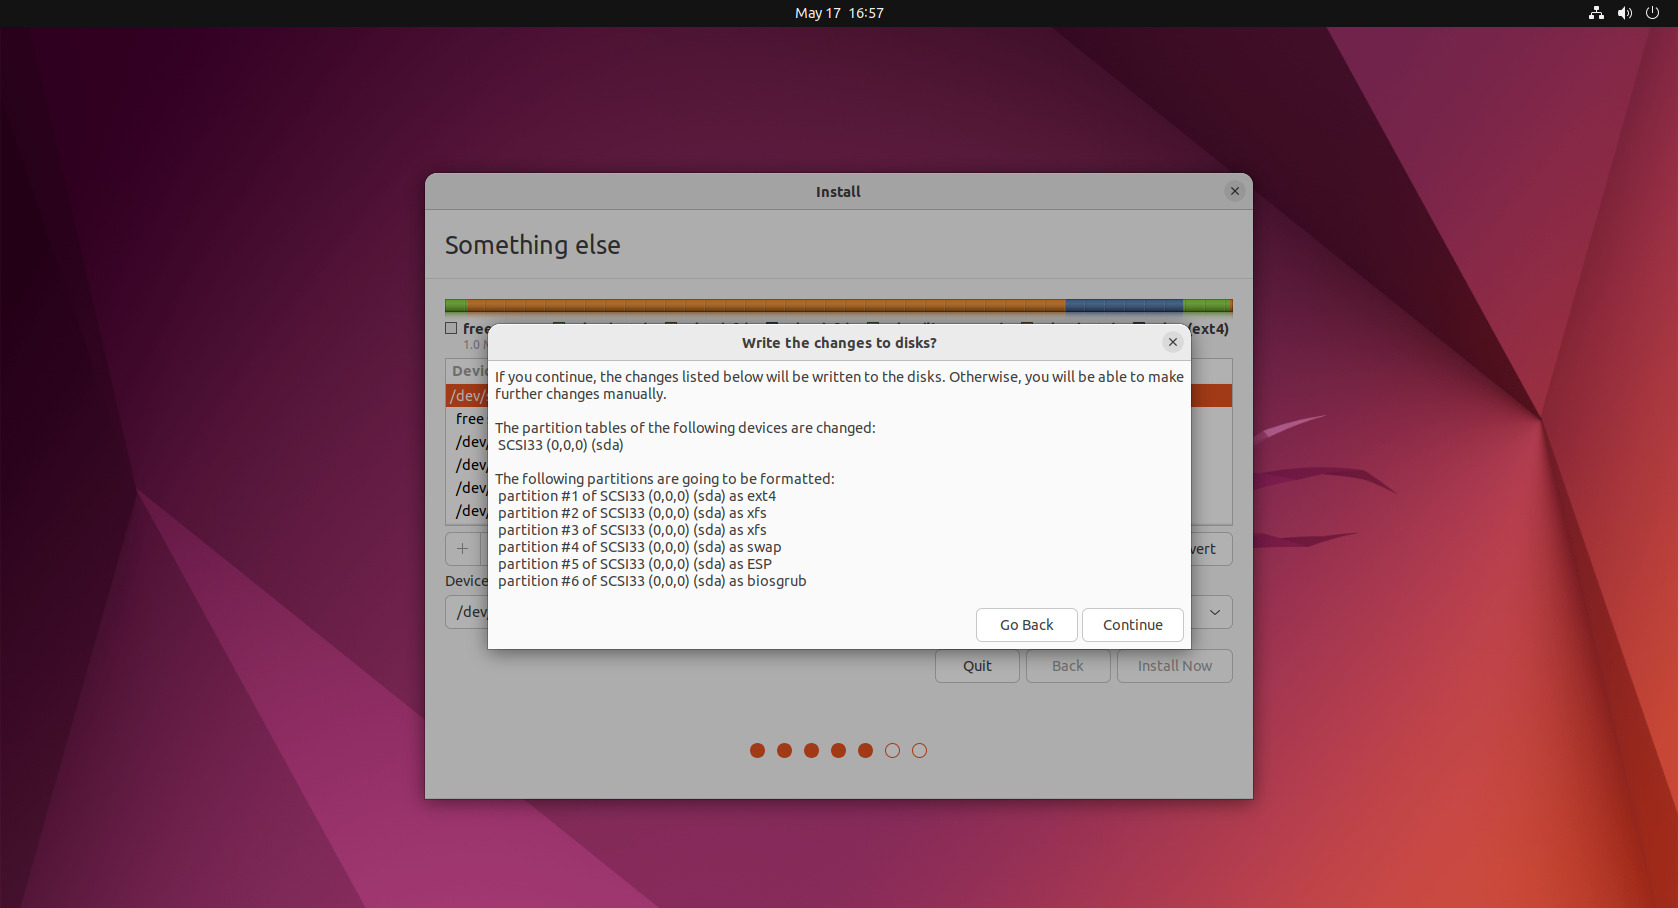
5.2 Select Time Zone
Select the location as per your current region, it will configure time zone accordingly.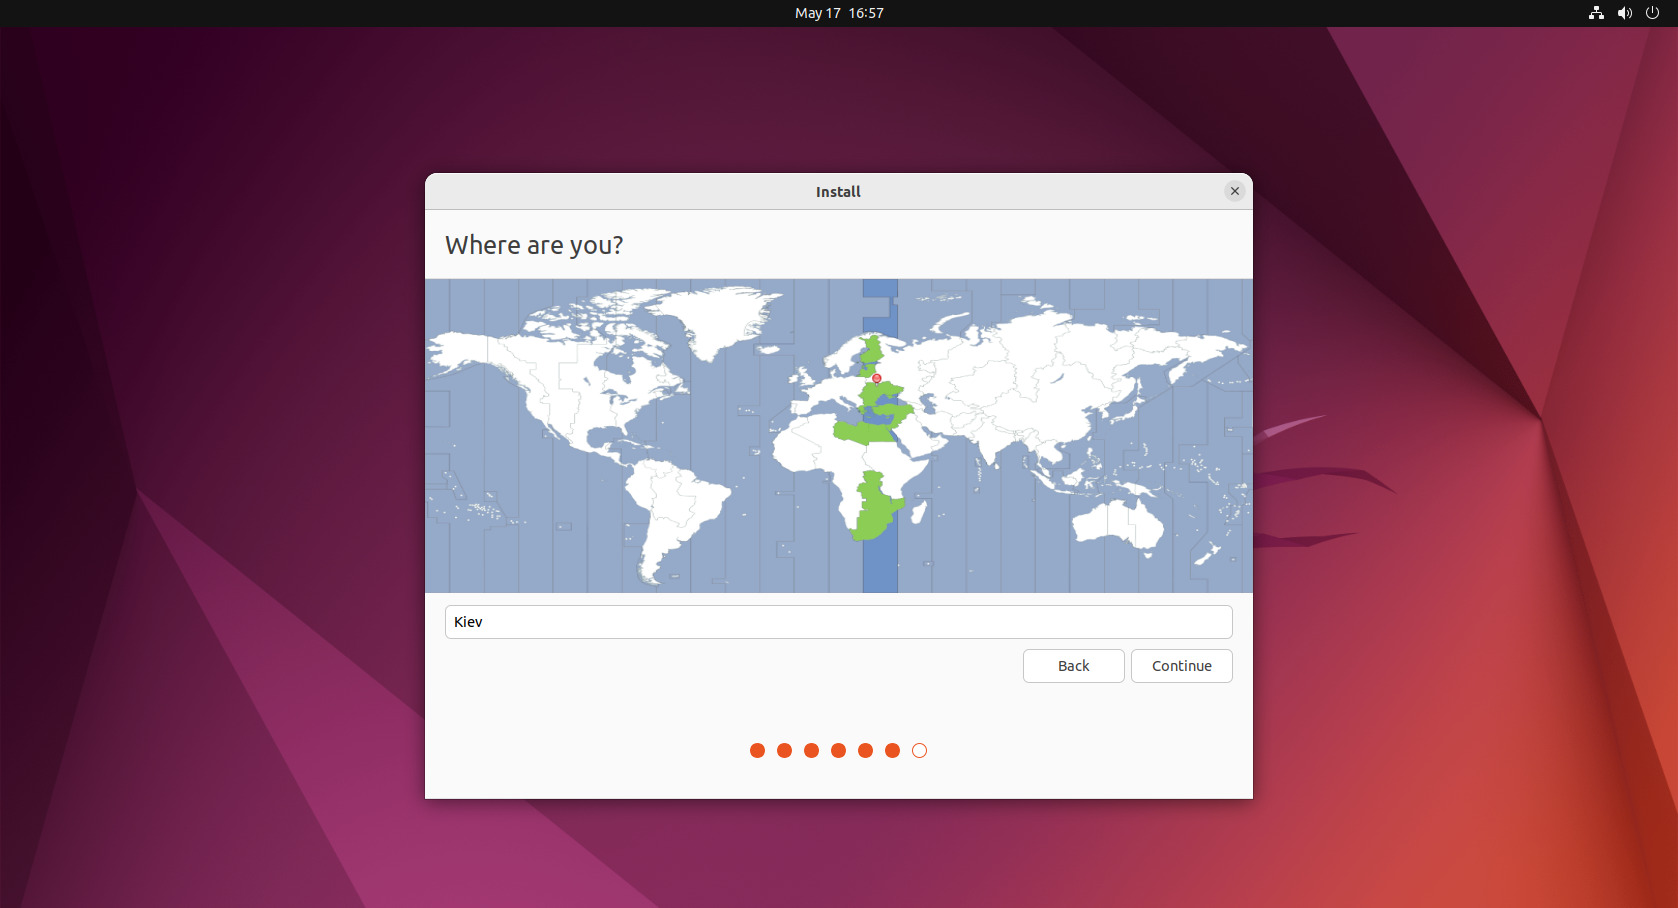
5.3 Create User Account
Configure a user account to the system. Fill out the form with the following details:
- Name – Your actual name.
- Computer’s name – This is the hostname. Use this name to your machine remotely.
- Username – Name of the account.
- Password – Enter and confirm a strong password. The form automatically evaluates the password strength.
- Log in automatically – Not recommended for servers with public .
- Require my password to log in – Recommended for servers with public .
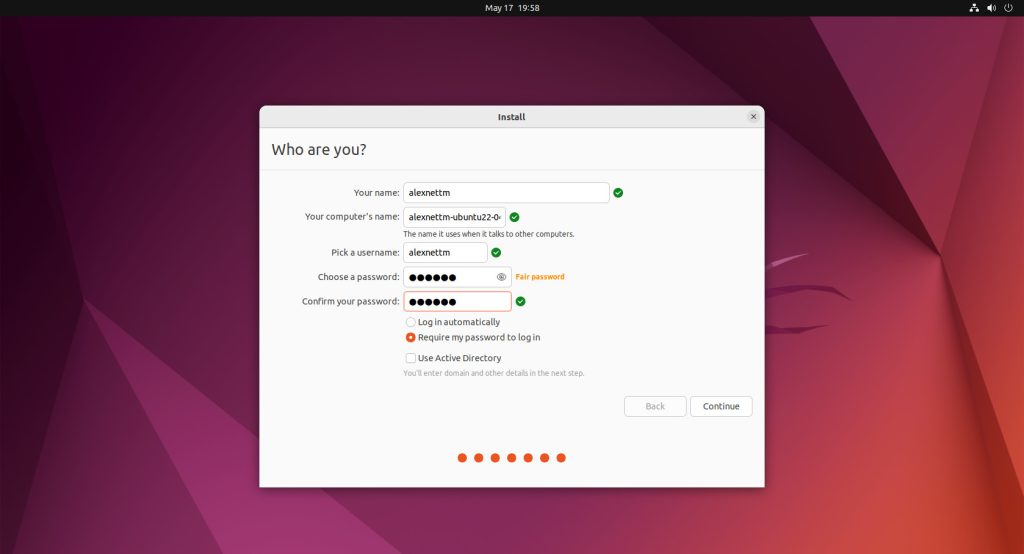
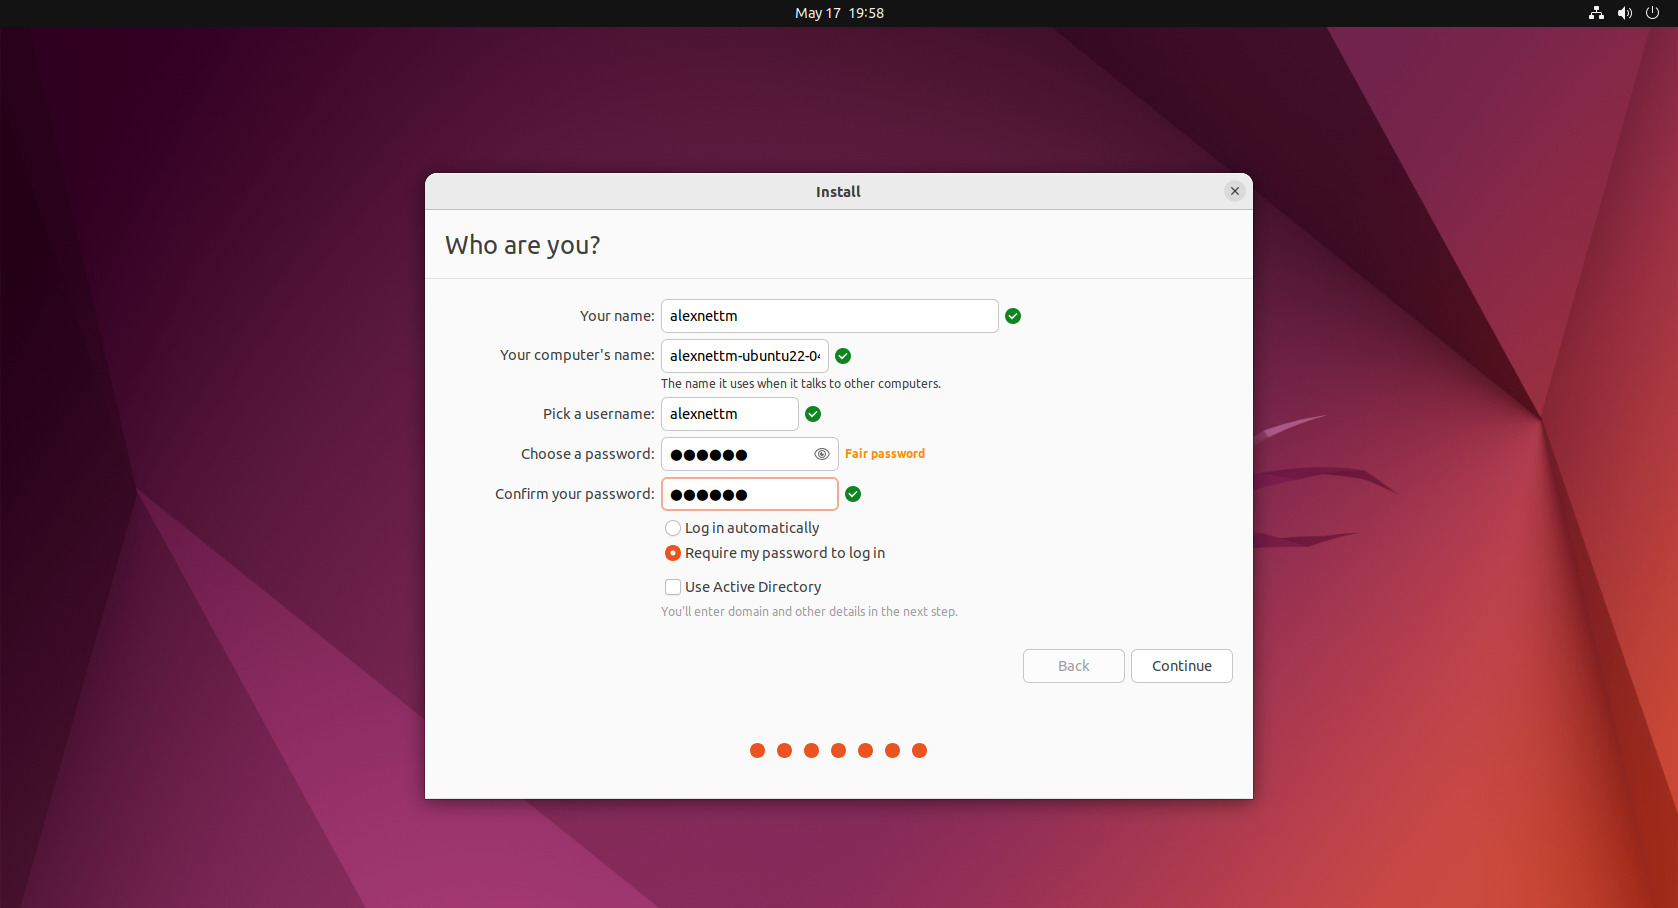
Click on Continue to proceed further with installation.
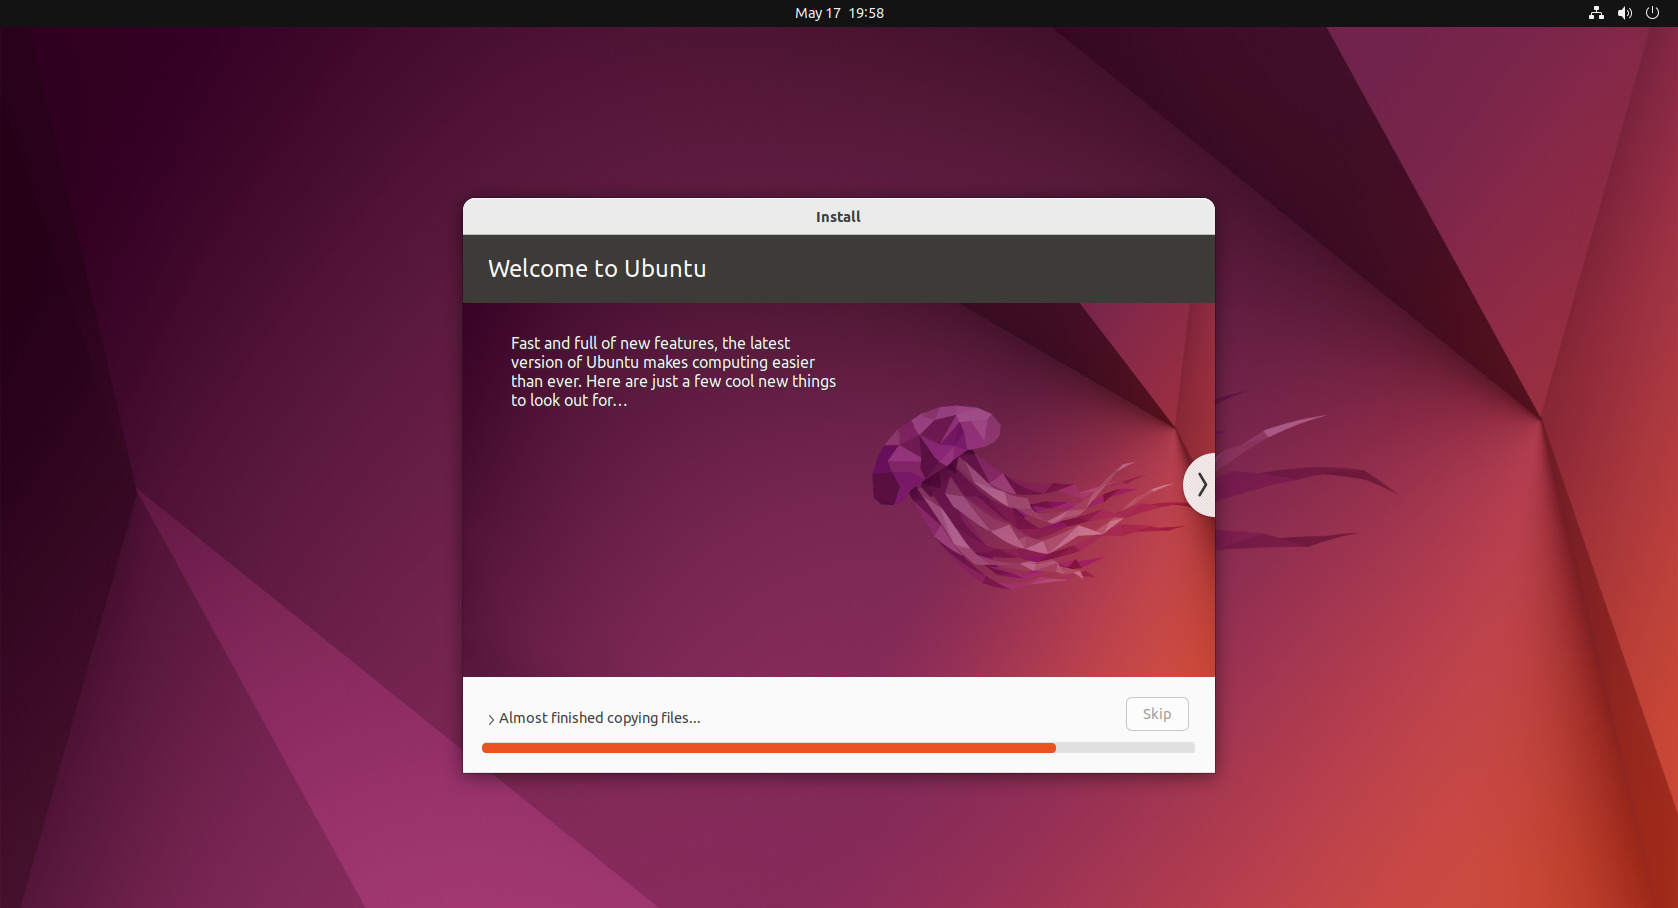
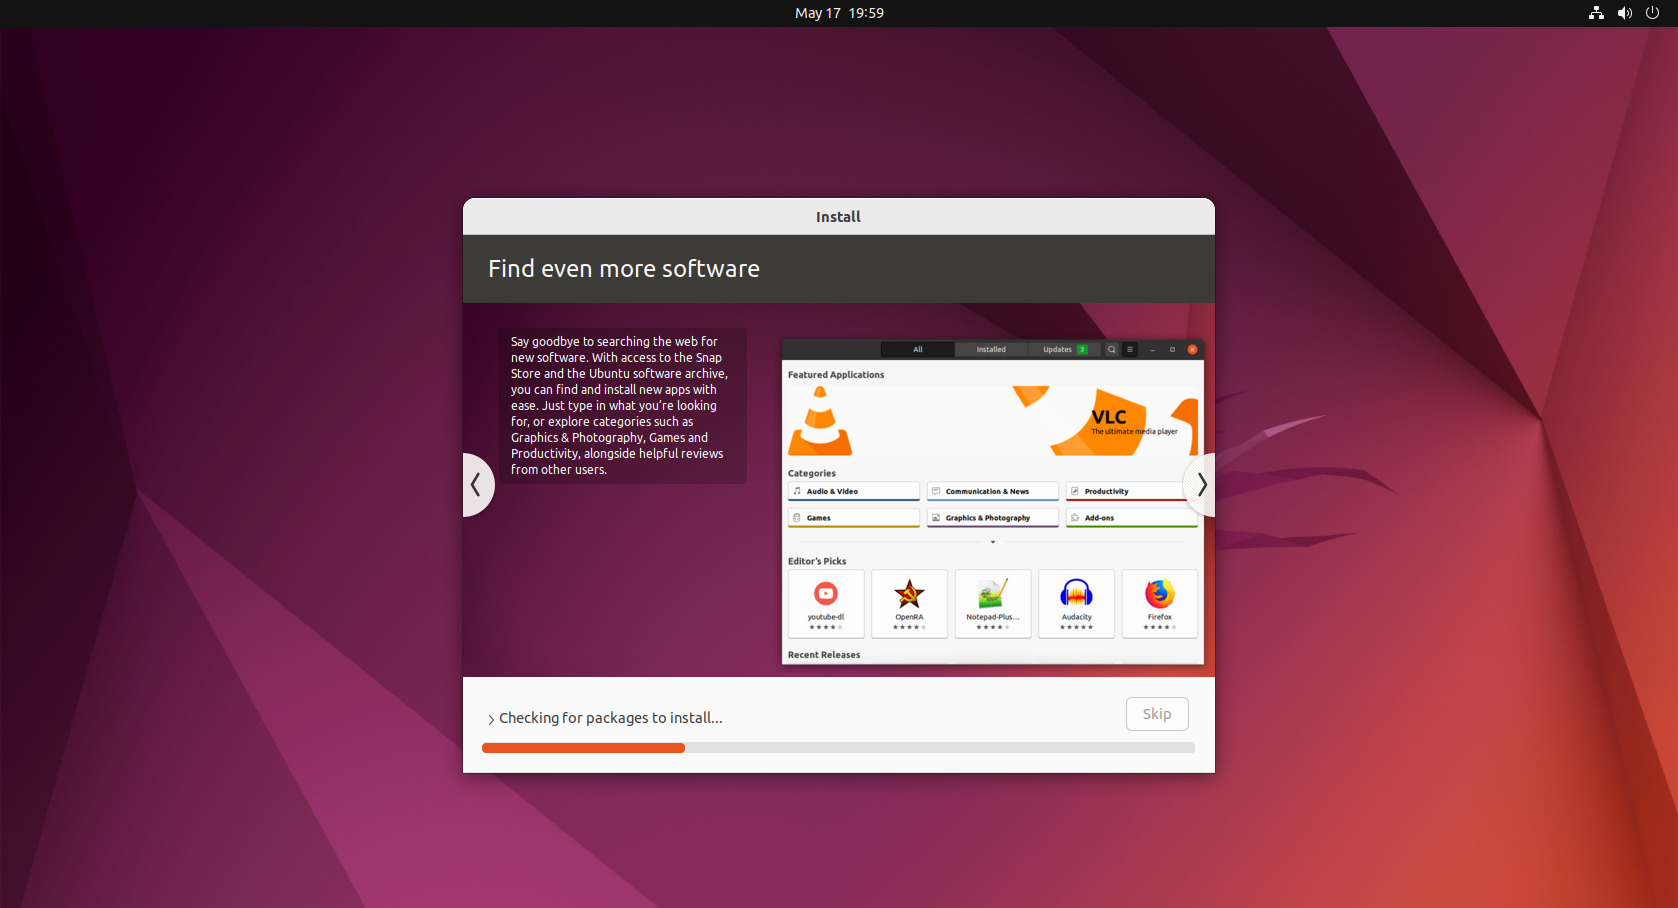
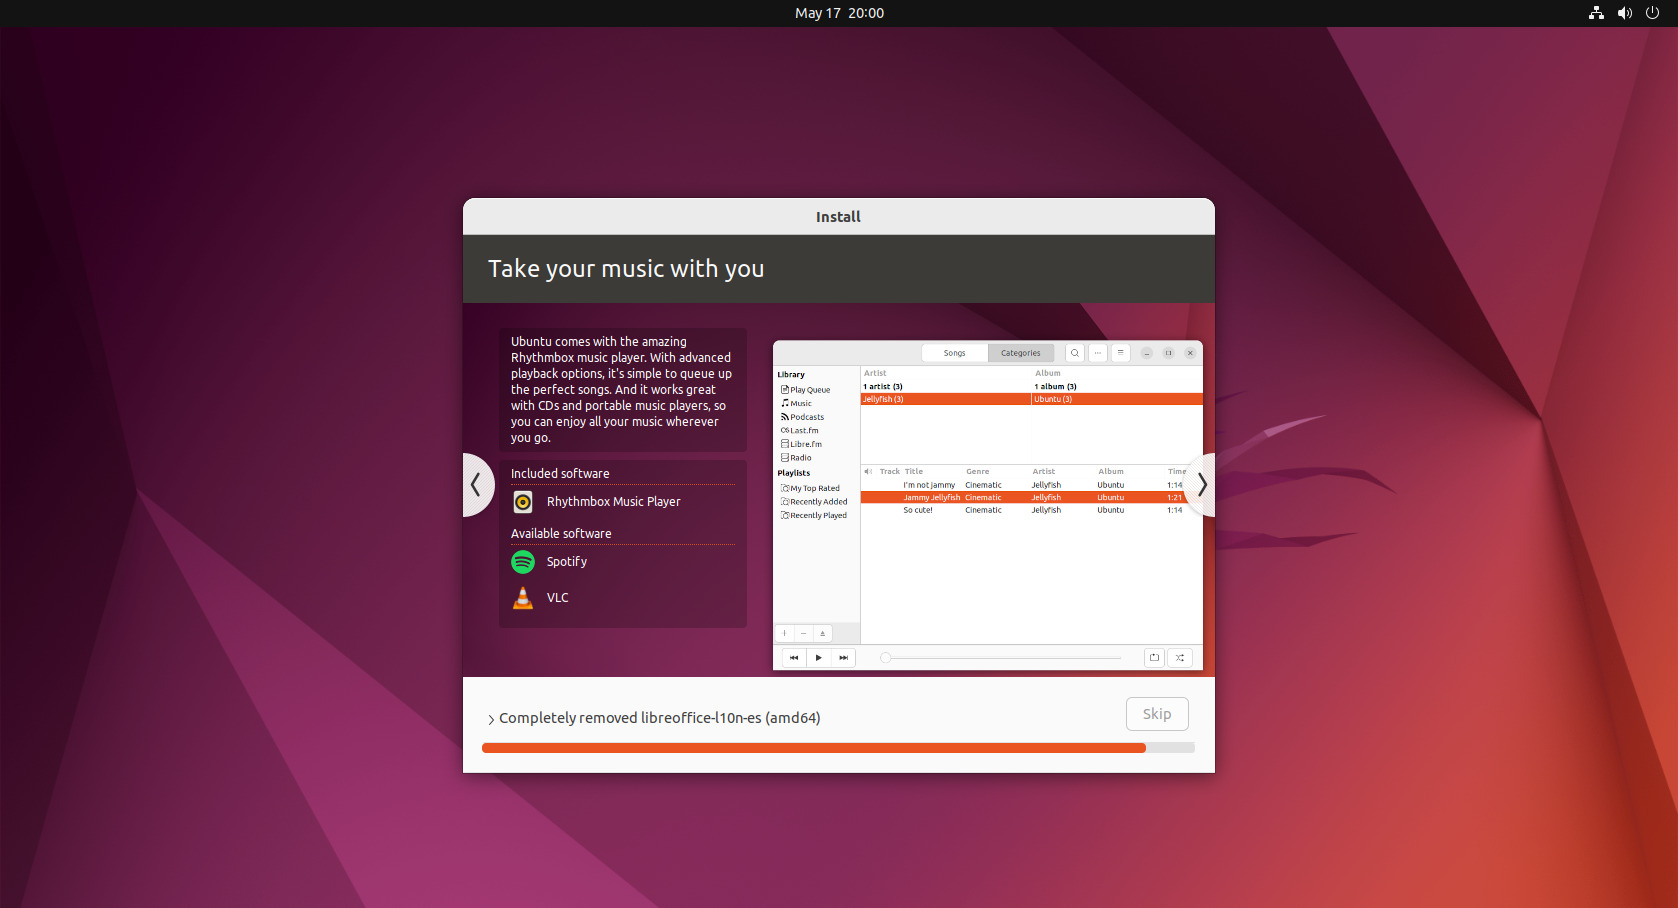
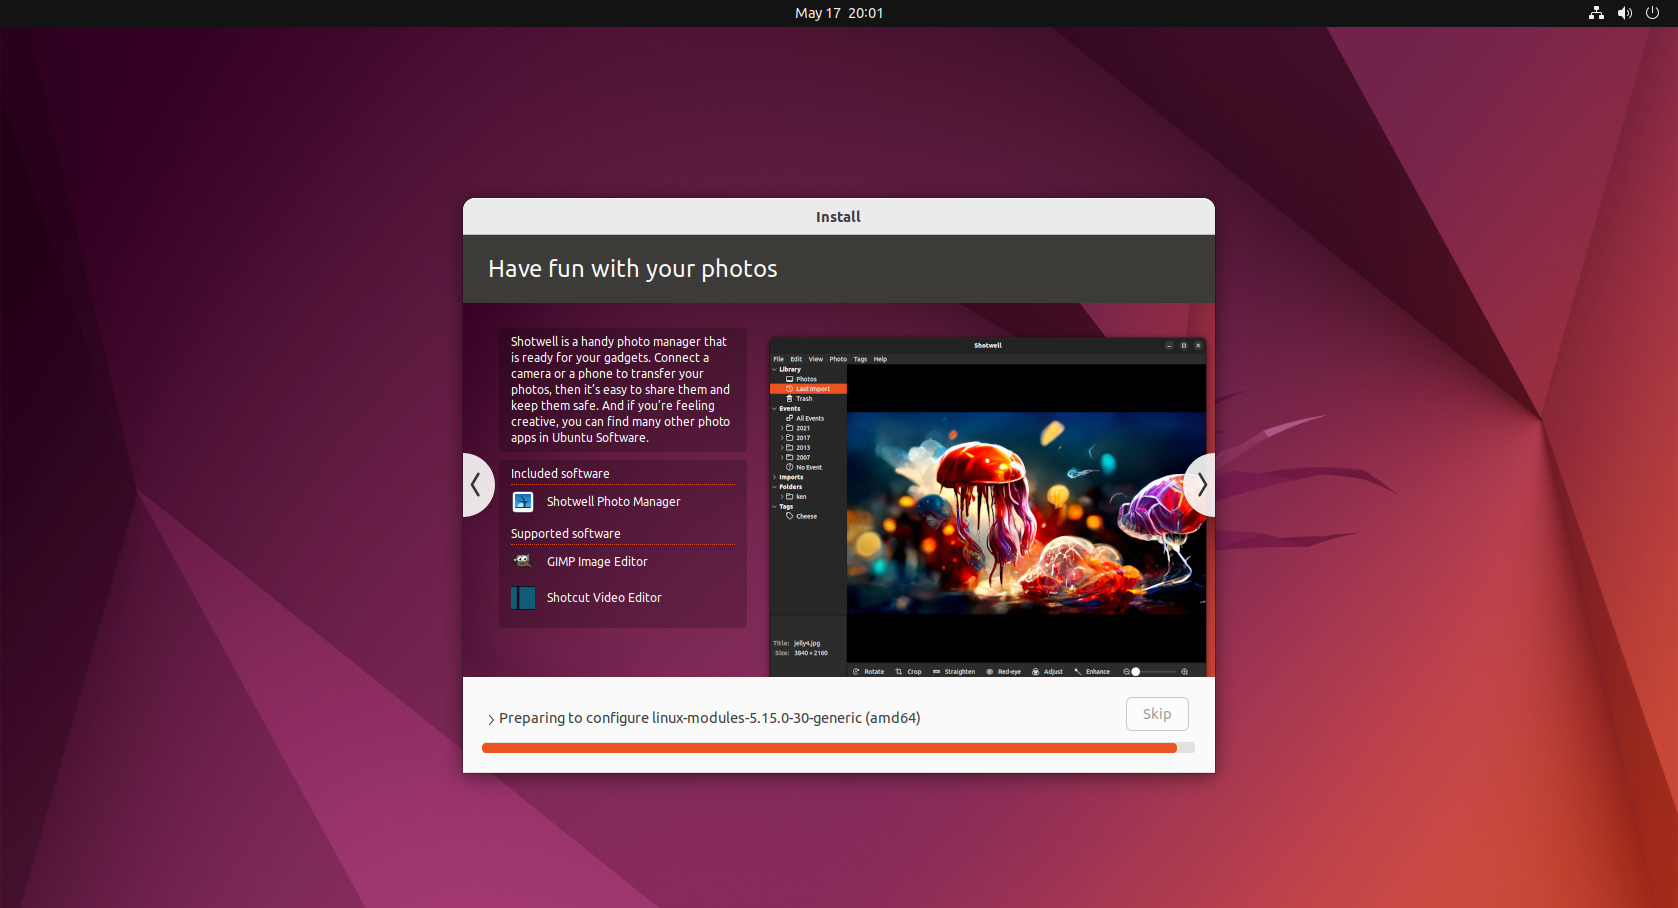
5.4 Installation Started
As we see in the following window, installation has started, and it is in progress.
5.5 Finish and Reboot
Once the installation is completed, we will be prompted to reboot the system.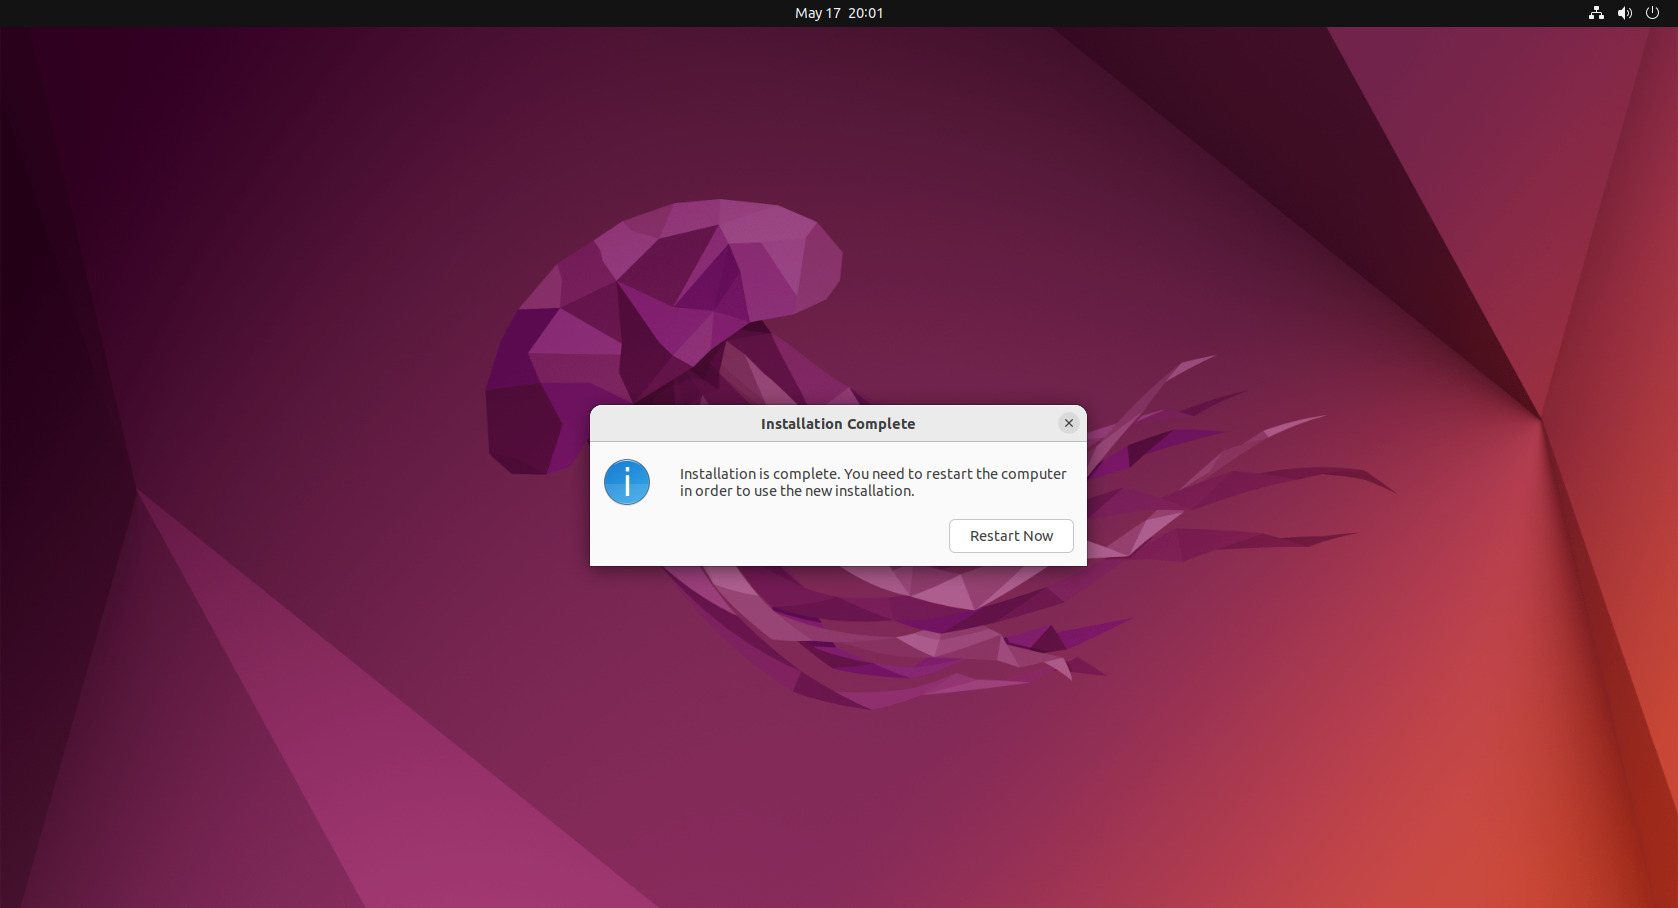
Remove the installation media and click Restart Now.
6. Login Screen after Installation
When the system restarts, the login screen appears.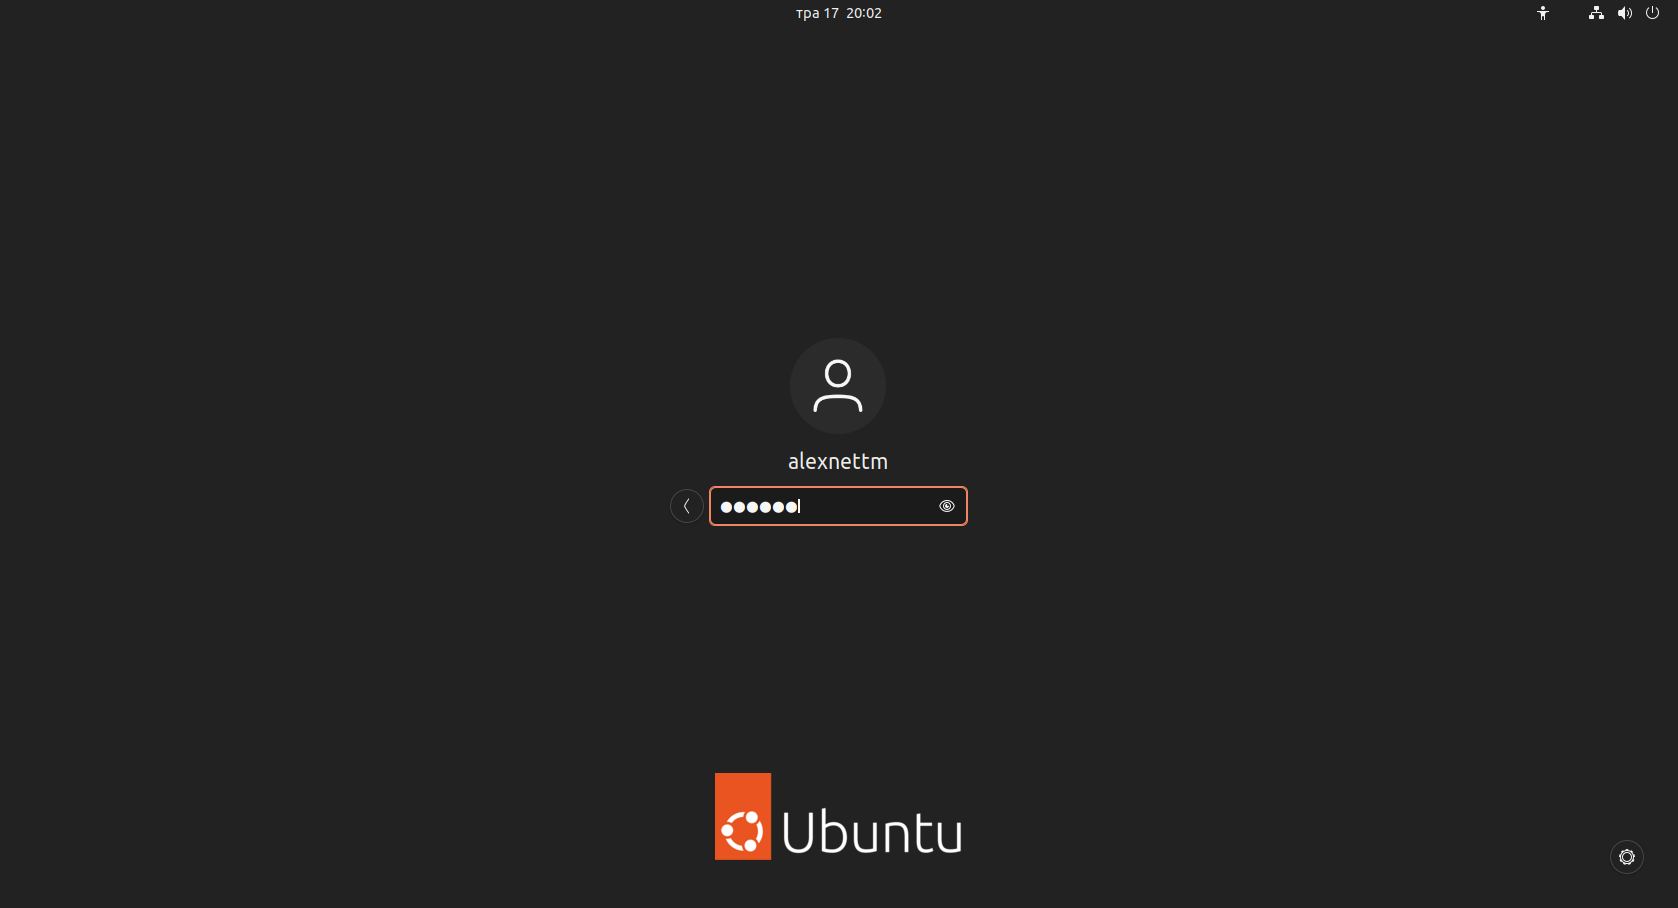
Click the username and enter the credentials from the installation process.
The desktop shows up, indicating the Ubuntu 22.04 installation is successful and complete.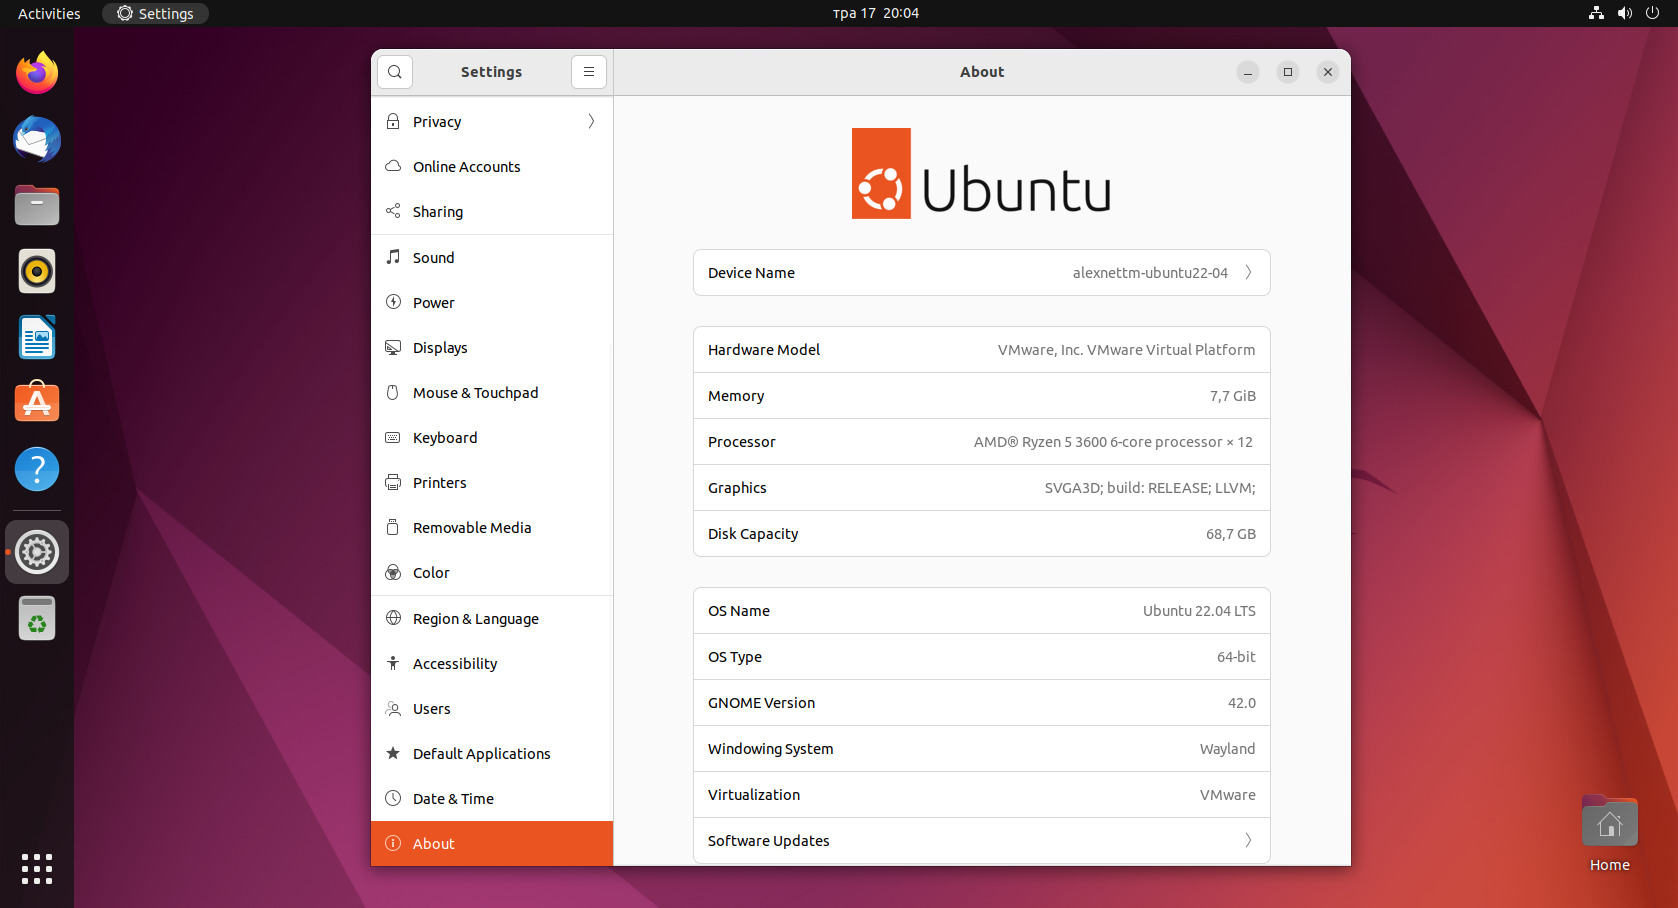
This screen confirms that Ubuntu 22.04 LTS is successfully installed. Next, update and upgrade your system and explore the new features.