Microsoft is constantly improving the Windows operating system’s security through policy implementations and hardening the hardware requirements. One security feature has been around since Windows 10: Tamper Protection, which is enabled by default on both Windows 10 and Windows 11 operating systems.
The purpose of this feature is 2-fold. It keeps your system safe from unauthorized changes to Windows Security configurations. However, when enabled, even an administrative user is unable to make changes from outside the Windows Security app.
What Is Tamper Protection on Windows 11?
Tamper Protection is a Windows Security (formerly known as Microsoft Defender Antivirus) feature. When enabled, this feature blocks malicious and third-party applications from making unauthorized changes to Windows Security settings and configurations.
Exploits and trojan horses increase the attack surface by reducing your system’s security by making changes to the current security settings. If Tamper Protection is disabled, viruses can take control of the app or its respective Group Policy or Windows Registry settings and make unauthorized changes, making your system vulnerable to other threats.
However, if it is enabled, any malicious app or virus would be unable to make these changes.
That said, with Tamper Protection enabled, administrators can still make changes to the Windows Security settings from the app. Moreover, it cannot control how third-party antivirus software interoperates with the Windows Security app.
Now that we understand how useful this feature is, let’s continue to see how to disable Tamper Protection when needed.
How to Disable Tamper Protection on Windows 11?
If you want to turn off Tamper Protection on your Windows 11 computer, you can follow this guide:
Step 1: Press Windows + I to open the Settings app.
Step 2: Go to Privacy & security > Windows Security, then click Virus & threat protection under Protection areas from the right panel.
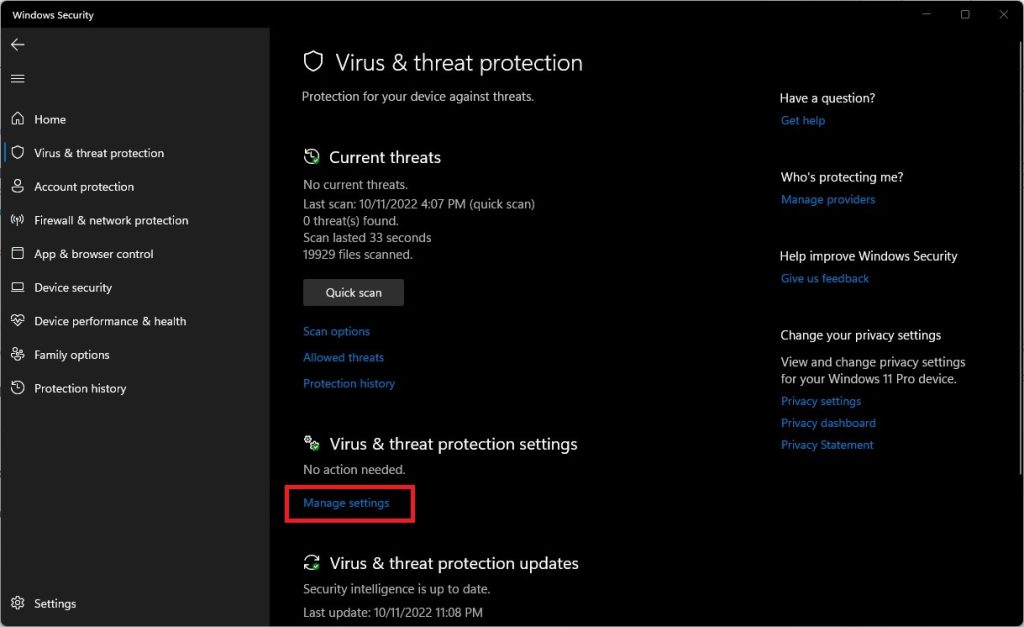
Step 3: Scroll down to find the Virus & threat protection settings section. Then, click Manage settings to continue.
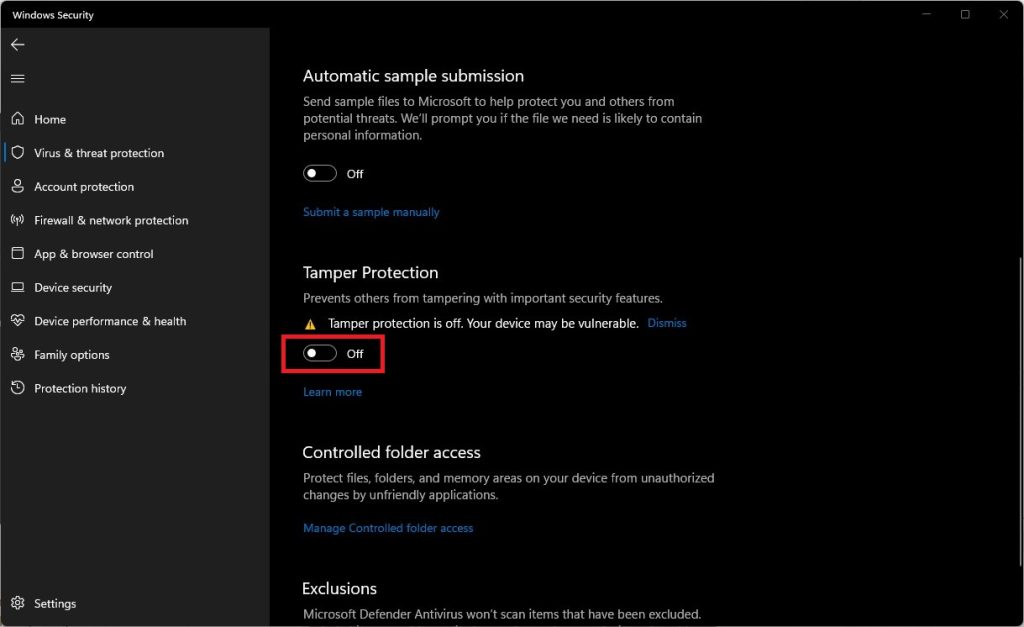
Step 4: Scroll down to the Tamper Protection section on the next page. Check if this feature is turned on. If yes, you need to click the button to turn it off. If you see the User Account Control interface, you need to click the Yes button to allow your operation.
After these steps, Tamper Protection is disabled. Then, you can try to modify the security feature outside the Windows Security app. This time, you should be able to do these things.
How to Enable Tamper Protection on Windows 11?
If you want to turn on Tamper Protection on your Windows 11 computer, you can follow this guide:
Step 1: Press Windows + I to open the Settings app.
Step 2: Go to Privacy & security > Windows Security, then click Virus & threat protection under Protection areas from the right panel.
Step 3: Scroll down to find the Virus & threat protection settings section. Then, click Manage settings to continue.
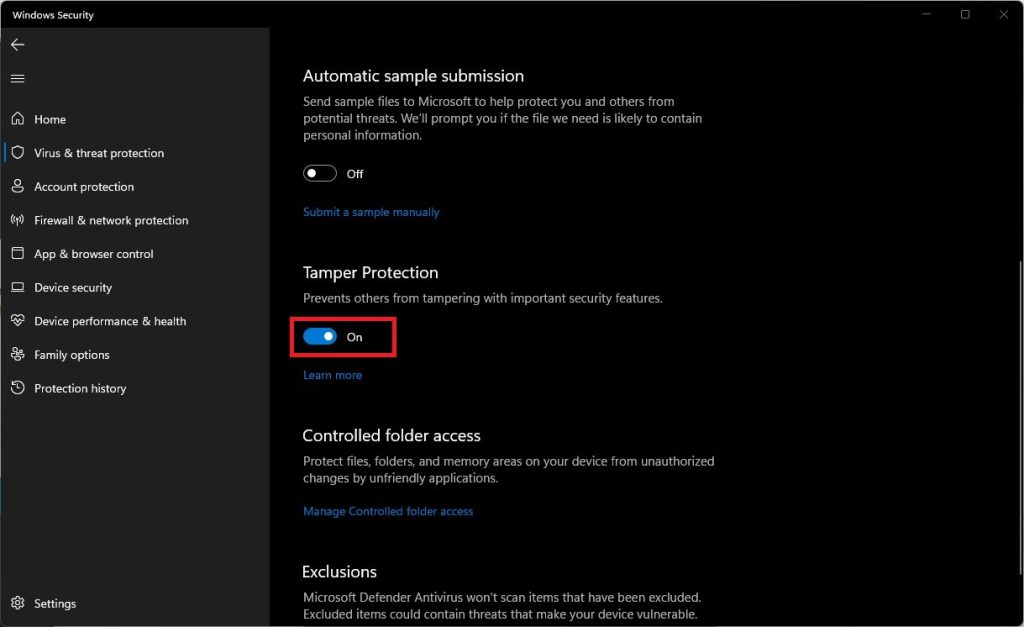
Step 4: Scroll down to the Tamper Protection section on the next page. Check if this feature is turned off. If yes, you need to click the button to turn it on. If you see the User Account Control interface, you need to click the Yes button to allow your operation.
Now, Tamper Protection is enabled again on Windows 11. It works to protect others from tampering with important security features.


