Windows 11 incorporates several performance-enhancing features that operate behind the scenes, resulting in a faster PC compared to Windows 10. Nevertheless, there are additional measures you can take to optimize your Windows 11 PC, as PC’s typically become slower over time. By following these tips, you can effectively boost your PC’s speed.
Note: The tips outlined in this article pertain to Windows 11 version 22H2. If you are using an earlier version of Windows 11, some aspects may differ slightly.
1. Disable programs that run on startup
In order to improve the performance of your Windows 11 PC, it is recommended to disable any programs that are running in the background but are rarely or never used. This can be done by accessing the Task Manager, which can be launched by pressing Ctrl-Shift-Esc, right-clicking the lower-right corner of your screen and selecting Task Manager, or typing “task manager” into the Windows 11 search box and pressing Enter.
Once in the Task Manager, click on the Startup apps icon on the left side of the screen, which displays a list of all the programs and services that launch when Windows starts up. Each program’s name, publisher, startup status, and impact on system speed is listed, although note that this list does not show how much each program may impact performance during regular PC usage.
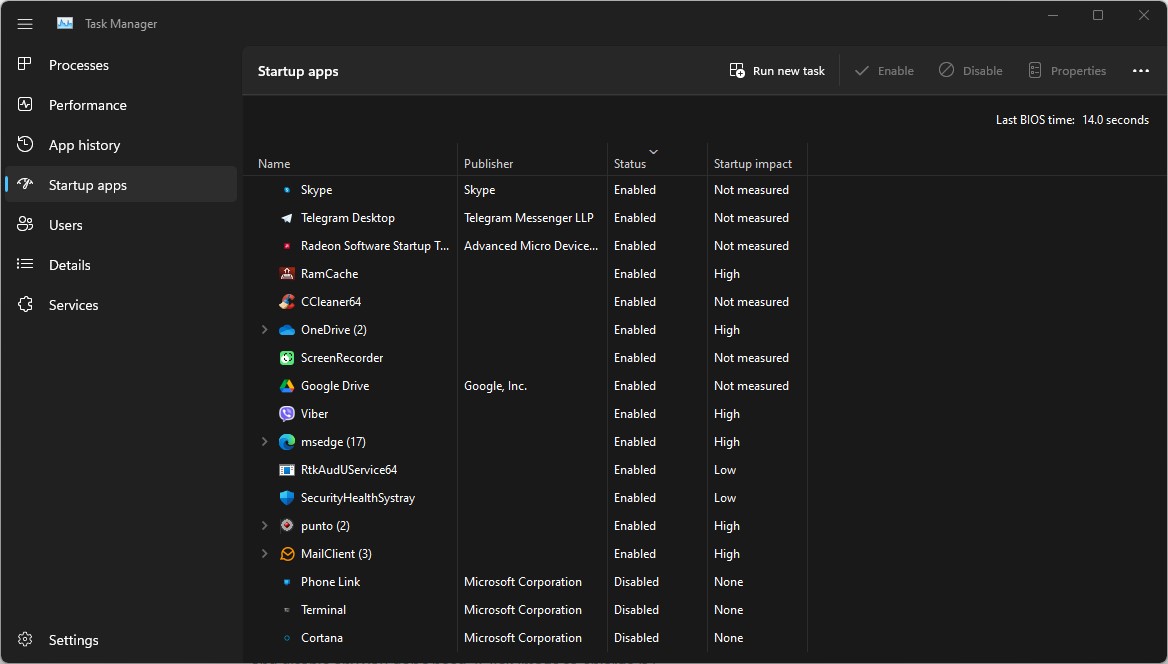
To disable a program from launching at startup, right-click it and select “Disable“. This will prevent the program from launching automatically, although it can still be run manually later on. To enable a program to launch at startup again, simply return to this area of the Task Manager and right-click on the program and select “Enable“.
While many of the programs and services listed may be familiar, some may not be recognizable. The Task Manager can provide more information about these unfamiliar programs by allowing you to view their properties, file location, and version number. Additionally, selecting “Search online” after right-clicking on an item can launch Bing with links to sites that provide more information about the program or service.
If you are unsure about a particular application, you can go to a site called “Should I Block It?” run by Reason Software and search for the file name to find more information.
After disabling any unnecessary programs, your computer should run faster and more efficiently when it starts up.
The Ultimate Guide to Installing Windows 11 from a USB drive
2. Use Efficiency Mode
Efficiency Mode is a handy feature that can enhance the performance and extend the battery life of your Windows 11 PC. Introduced in Windows 11 22H2, it reduces the process priority of background applications and utilizes other efficiency tricks. Although the name may suggest otherwise, you can’t activate Efficiency Mode for your entire PC. Instead, you can use Task Manager to enable it for individual apps and processes, with some limitations.
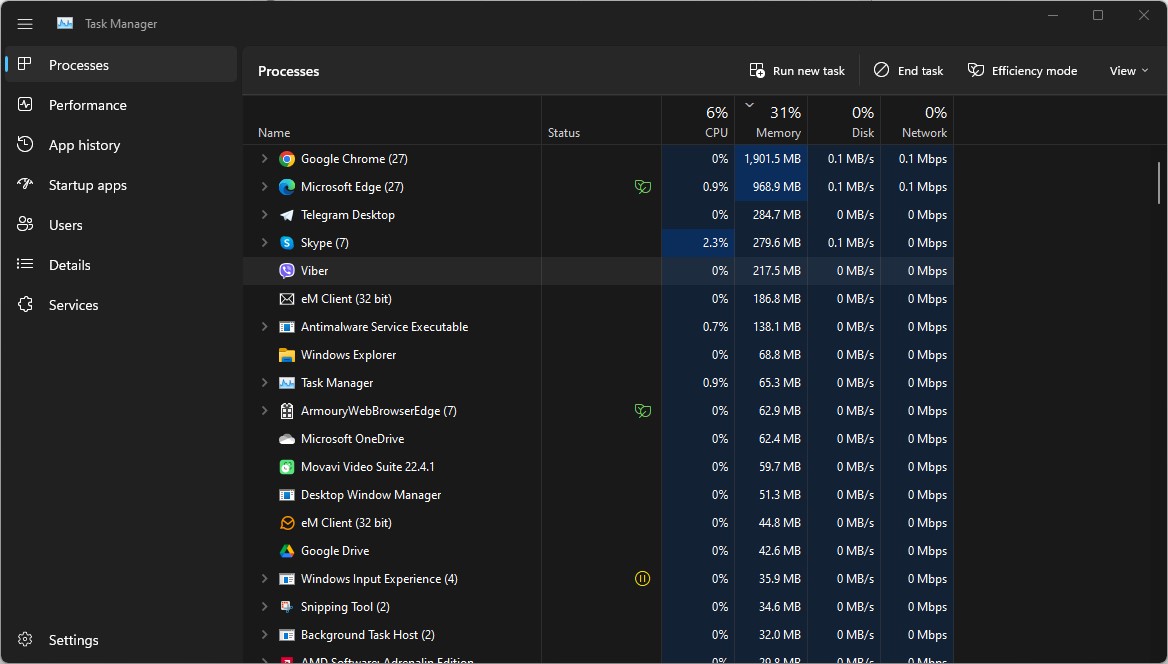
To access Efficiency Mode, open Task Manager using any of the methods mentioned earlier. Once you’re in Task Manager, select the Processes icon on the left side of the screen to view the list of running apps and processes. Choose the app or process that you want to activate Efficiency Mode for, click the Efficiency mode icon at the top right of the screen, and confirm the action. Keep in mind that if the Efficiency mode icon is disabled for a particular app or process, you won’t be able to enable it. Additionally, certain apps like Microsoft Edge automatically operate in Efficiency Mode and can’t be turned off.
3. Use automatic Windows maintenance
Windows 11 constantly performs background maintenance on your PC, which includes tasks such as security scanning and system diagnostics to ensure optimal performance. This maintenance is set to run automatically every day at 2:00 a.m. if your device is plugged in and asleep. However, it’s possible that the feature was accidentally turned off, or it may not have run recently if you shut down your PC at night or haven’t plugged in your laptop for a while.
To ensure that your PC is running at peak performance, it’s important to check that automatic maintenance is turned on and running every day. You can also choose to run it manually if you prefer. To do this, click on the search icon on the taskbar, type “Control” in the search box, and select Control Panel from the results. In the Control Panel app, go to System and Security > Security and Maintenance, and under the Maintenance section, click “Start maintenance” if you want to run it now. To ensure that it runs every day, click “Change maintenance settings” and select the time you’d like maintenance to run. Check the box next to “Allow scheduled maintenance to wake up my computer at the scheduled time” and click OK.

4. Kill adware and bloatware
It’s possible that the cause of your PC’s sluggish performance isn’t Windows 11, but rather bloatware or adware that consumes CPU and system resources. These types of software are especially problematic because they may have come pre-installed on your computer by the manufacturer and run automatically without your knowledge. Removing them can significantly improve your PC’s performance.
Start by running a system scan to detect and remove adware and malware. If you have a security suite like Norton Security or McAfee LiveSafe installed, use that. Alternatively, Windows Security, the built-in anti-malware app in Windows 11, is also effective. Just search for “windows security” in the search box, click “Virus & threat protection“, click “Quick scan” and it will find and remove any malware it detects.
However, it’s a good idea to get a second opinion, so consider using a free tool like Malwarebytes Anti-Malware, which scans for and removes malware and adware. The paid version provides always-on protection to prevent infections in the first place.
After cleaning up your system, check for bloatware and uninstall it. A useful free tool for this purpose is Bulk Crap Uninstaller. Another option is to visit Should I Remove It?, which provides advice on which software is necessary and which can be safely uninstalled. The site also offers manufacturer-specific instructions on how to remove bloatware, making it a valuable resource.
Lastly, when purchasing a new PC online, look for options to exclude trial software and unnecessary applications that you don’t need to run your computer. This can help prevent bloatware from getting installed on your system in the first place.
5. Turn off search indexing
Windows 11’s search feature automatically indexes your hard disk in the background, which makes searching for files on your PC faster. However, this indexing process can slow down slower PCs and even affect the performance of SSDs due to the constant writing to disk. If you have a slower machine, turning off indexing can give you a speed boost.
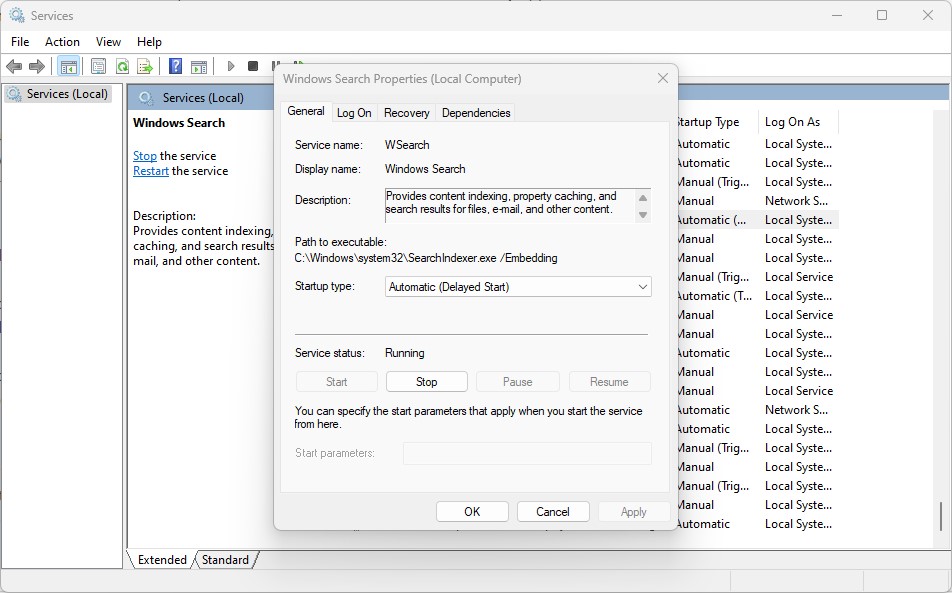
To turn off indexing completely, click the search icon on the taskbar, type “services.msc” in the search box, and press Enter. The Services app will open, where you can find either “Indexing Service” or “Windows Search” in the list of services. Double-click on it and click “Stop” on the screen that appears. Then, reboot your computer. Your searches may be slightly slower, but you’ll likely experience an overall speed boost.
Alternatively, you can choose to turn off indexing for specific locations on your hard disk instead of disabling it completely. This way, you can still get fast searches for frequently used files while improving your PC’s performance.
To do this, type “index” in the Windows 11 search box and select “Indexing Options” from the results. On the Indexing Options page in the Control Panel, click the “Modify” button to see a list of indexed locations, such as personal files and Microsoft Outlook. Uncheck any location you don’t want to be indexed, and it will no longer be indexed.
6. Clean out your hard disk
If your hard disk is full of unnecessary files, it can slow down your PC’s performance. Fortunately, Windows 11 has a built-in tool called Storage Sense that can help you clean up your hard disk and give your computer an immediate speed boost.
To enable Storage Sense, click on the Start button and go to Settings > System > Storage. Scroll down to the Storage Sense section and toggle it from Off to On. From now on, Windows 11 will constantly monitor your PC and delete old junk files that you no longer need, such as temporary files, old Recycle Bin files, and files in the Downloads folder that haven’t been modified in a month.
You can also customize how Storage Sense works by clicking on the arrow to the right of the toggle. On the customization page, you can set up a schedule for running Storage Sense and choose what files you want to delete automatically. For example, you can tell Storage Sense to delete files in your Downloads folder that have been there for a certain amount of time or to wait a specific amount of time before deleting files in the Recycle Bin.
If you use iCloud Drive or iCloud Photos, you can also use Storage Sense to free up space from those services. You can have Storage Sense delete local iCloud Drive and iCloud Photos content from your PC if you haven’t used it for a specific amount of time.

7. Disable shadows, animations, and visual effects
If you’re a fan of Windows 11’s shadows, animations, and visual effects, known as “eye candy,” they’re unlikely to affect the performance of newer, faster computers. However, they may cause slower, older machines to lag.
To optimize your PC’s performance, turn off these effects if you have a slower computer. To do so, search for “sysdm.cpl” in the Windows 11 search box and then click the “sysdm.cpl” icon to launch the Control Panel’s System Properties dialog box. In the Performance section’s Advanced tab, click Settings, which will take you to the Performance Options dialog box. Make sure you’re on the Visual Effects tab to see a list of animations and special effects.
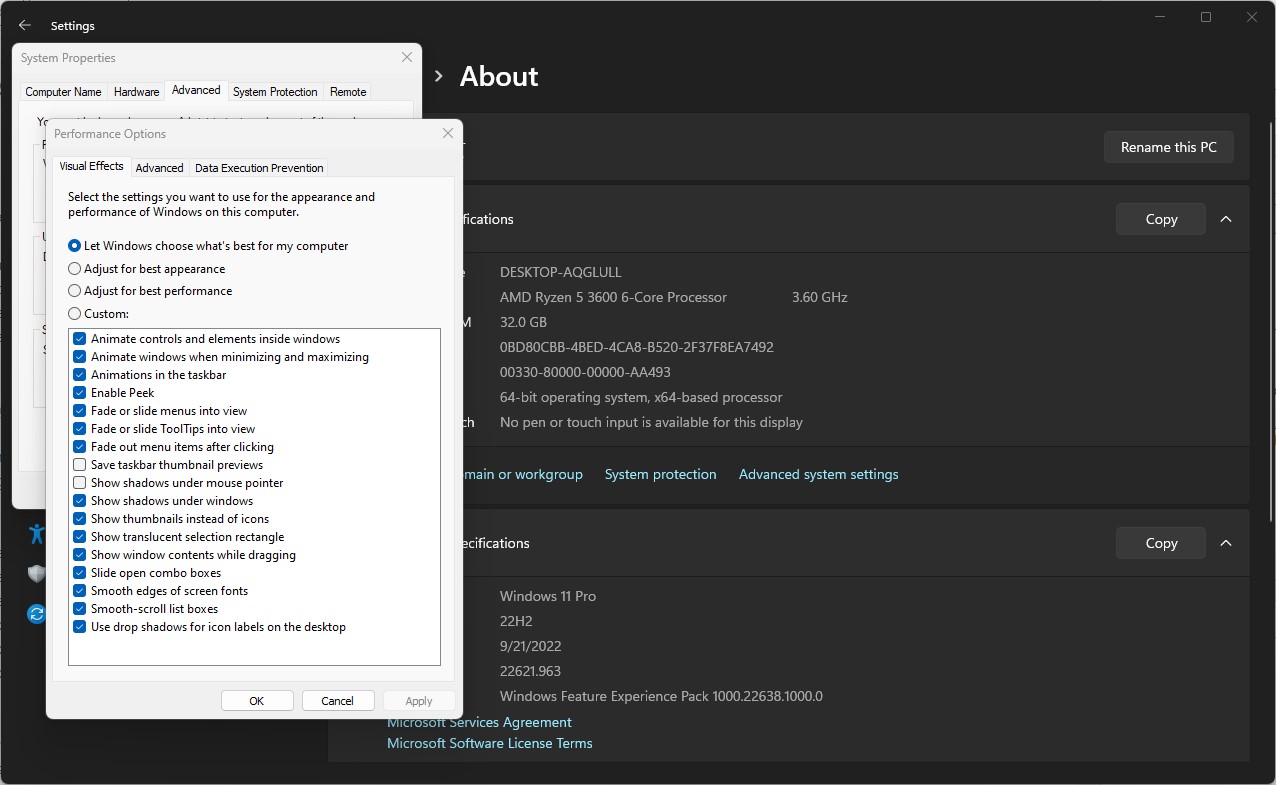
If you enjoy customizing your settings, you may choose to turn individual options on or off. However, to achieve the best performance, it’s recommended to select the Adjust for best performance option at the top of the screen and click OK. Windows 11 will disable the effects that slow down your system. Keep in mind that the following animations and special effects have the greatest impact on system performance and should be turned off:
- Animate controls and elements inside windows
- Animate windows when minimizing and maximizing
- Animations in the taskbar
- Fade or slide menus into view
- Fade or slide ToolTips into view
- Fade out menu items after clicking
- Show shadows under windows
Alternatively, selecting the Adjust for best performance option at the top of the screen and clicking OK is a simpler solution. This will prompt Windows 11 to disable the effects that are causing your system to slow down.
8. Disable transparency
If you’re looking for an even greater increase in speed, consider disabling the transparency effects in the taskbar and other Windows 11 locations in addition to turning off shadows, animations, and visual effects. Transparency effects require a lot of processing power, so disabling them can significantly improve system performance.
To turn off transparency effects, click the Start button and navigate to Settings > Personalization > Colors. Then, slide the Transparency effects slider to Off.

9. Change your power settings
It’s important to note that your Windows 11 PC’s power settings can affect its performance. If you’re using the “Power saver” plan, your PC’s performance will be reduced to conserve energy, even on desktop computers. Therefore, switching to the “High performance” or “Balanced” plan can instantly improve your PC’s performance.
To change your power plan, start by launching the Control Panel app. You can do this by typing “control” in the search box and clicking the Control Panel icon. Next, select Power Options. You’ll usually see two options: “Balanced (recommended)” and “Power saver.” Depending on your computer’s make and model, you may see additional plans, some of which are branded by the manufacturer. To access the “High performance” setting, click the down arrow next to “Show additional plans.”
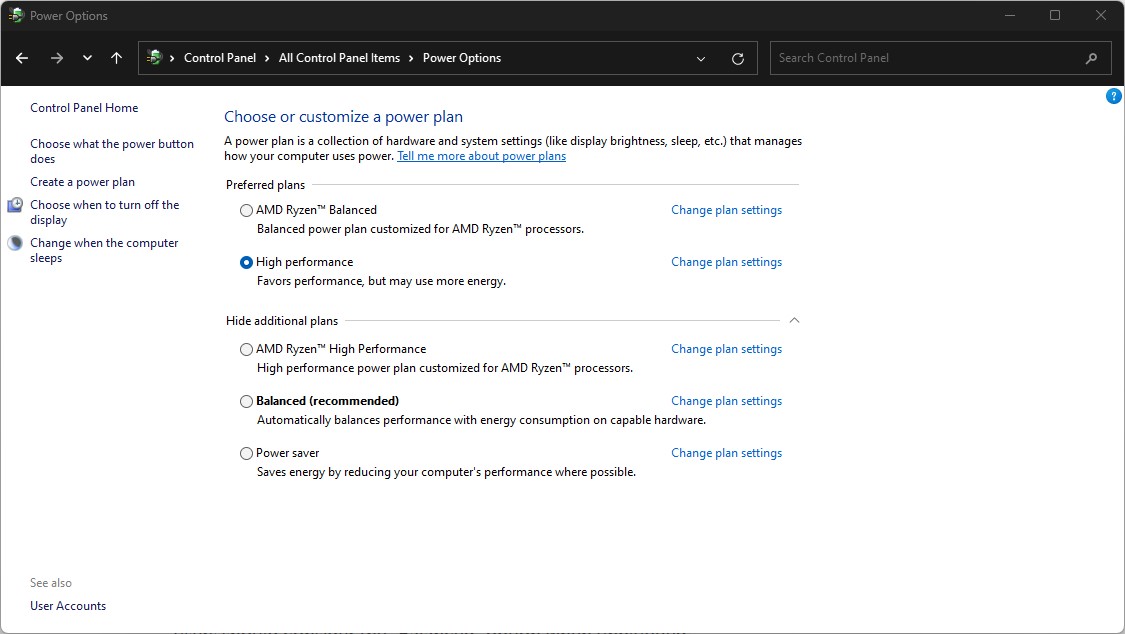
Once you have accessed the Power Options in Control Panel, select the power plan you want and then exit. Keep in mind that the “High performance” plan provides the most power and performance but consumes the most power. The “Balanced” plan strikes a balance between power usage and performance, while the “Power saver” plan prioritizes maximizing battery life. Desktop users should avoid the “Power saver” plan since it’s unnecessary, and even laptop users should consider switching to the “Balanced” plan when unplugged to strike a better balance between performance and battery life.
10. Turn off Windows tips and tricks
Windows 11 has a feature that monitors your activity on the computer and provides suggestions on how to use the operating system more efficiently. However, I find these “tips” to be unhelpful and I am concerned about the privacy implications of having Windows constantly observing my actions.
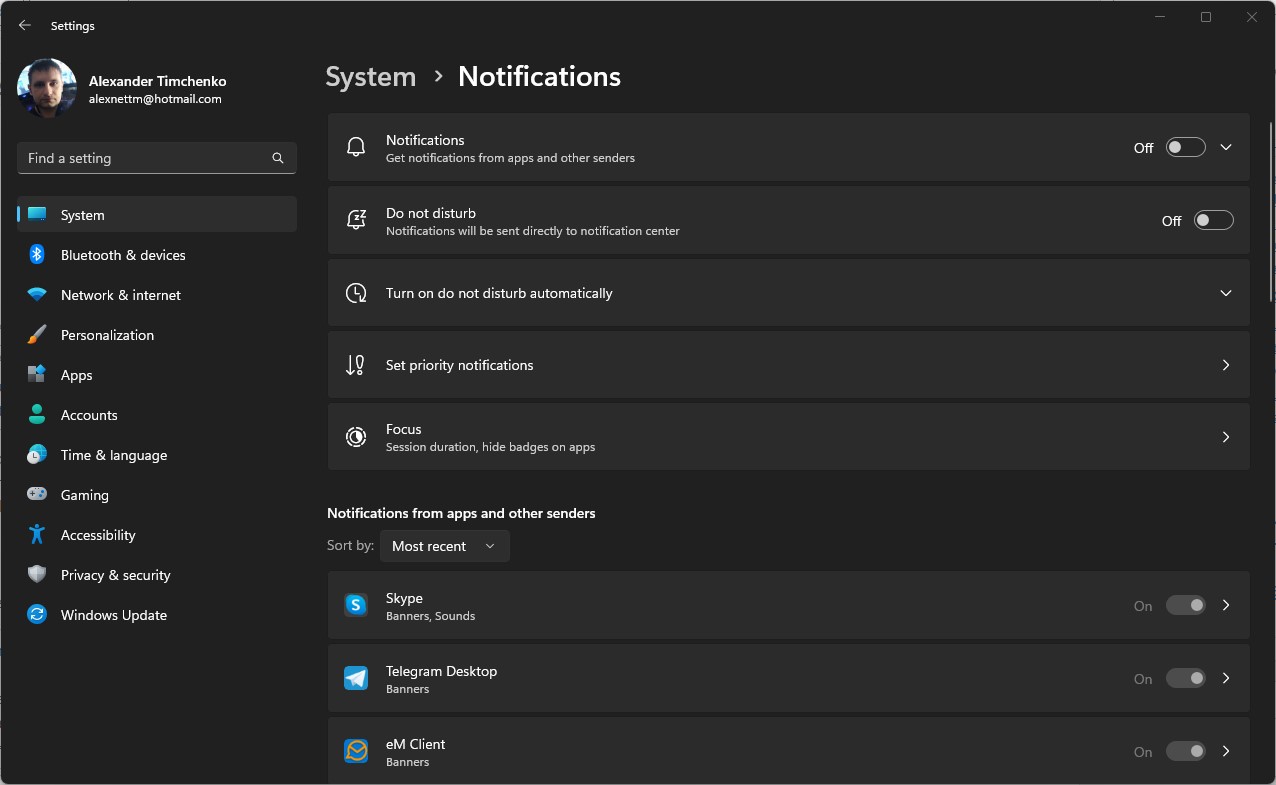
Moreover, this monitoring can cause your PC to slow down. To enhance your computer’s speed, disable this feature and prevent Windows from monitoring your activity. To do so, click the Start button and select Settings > System > Notifications. Scroll down to Additional settings and click the arrow to expand the options. Uncheck the box next to “Get tips and suggestions when using Windows.”
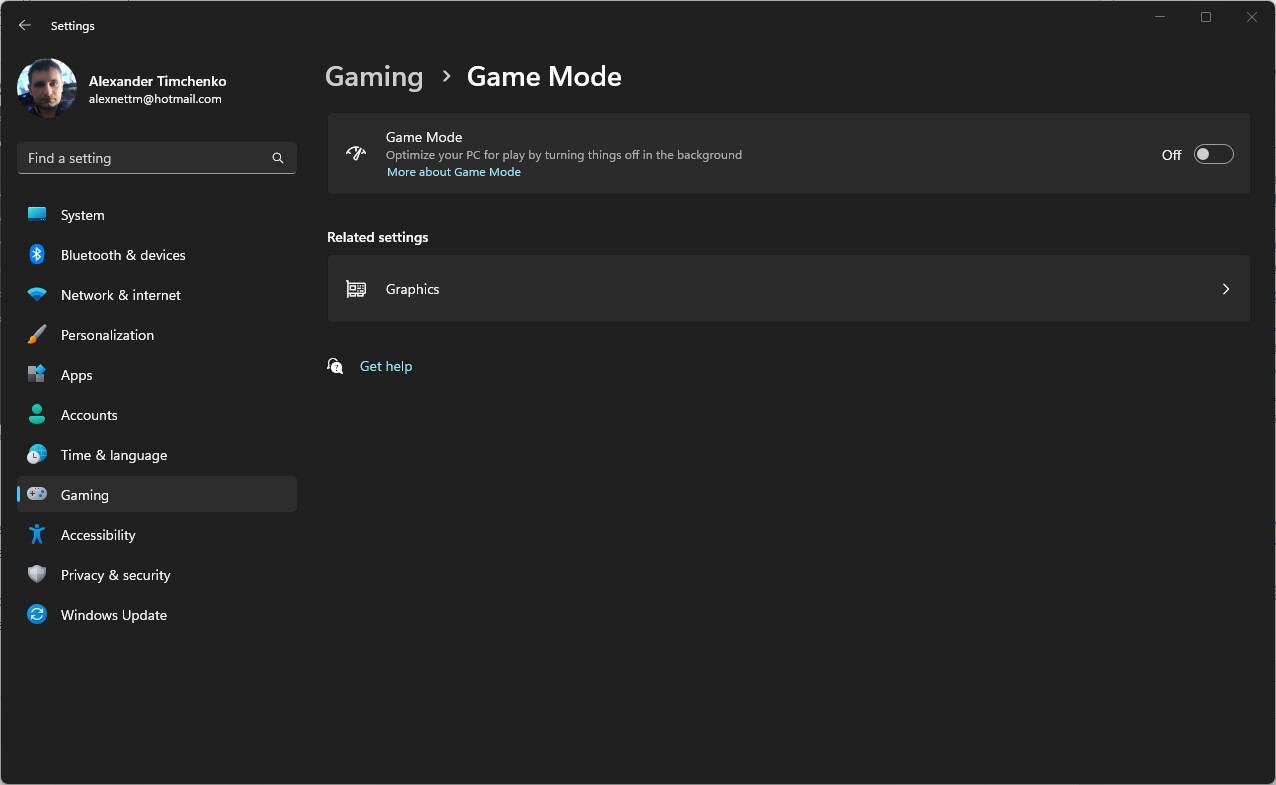
11. Disable Game Mode
Windows 11 includes a Game Mode feature that optimizes your PC’s performance for gaming. When you’re playing a game, Game Mode prioritizes system resources for gaming purposes by limiting the resources available to other apps and background processes. This is ideal for avid gamers, but it can slow down your system when you’re not gaming because it reserves some resources for gaming. Additionally, Game Mode can occasionally cause stability issues. Therefore, disabling Game Mode may provide your PC with a quick performance boost. You can always re-enable it when you’re ready to play a game.
Game Mode is enabled by default, even if you’ve never played a game on your PC. To disable it, navigate to Settings > Gaming > Game Mode and move the Game Mode slider to Off.
12. Restart Windows
Restarting your PC is an effective troubleshooting technique that can help speed up your Windows 11 system. When you shut down and restart your PC, it clears out any excess use of RAM that may be slowing down your system. It also stops any unnecessary processes that might be running in the background and impacting system performance.
If you’ve noticed that your Windows 11 PC has become sluggish for no apparent reason, restarting it can make a significant difference. Even if your system is running smoothly, it’s a good idea to restart your PC regularly as a preventive measure.