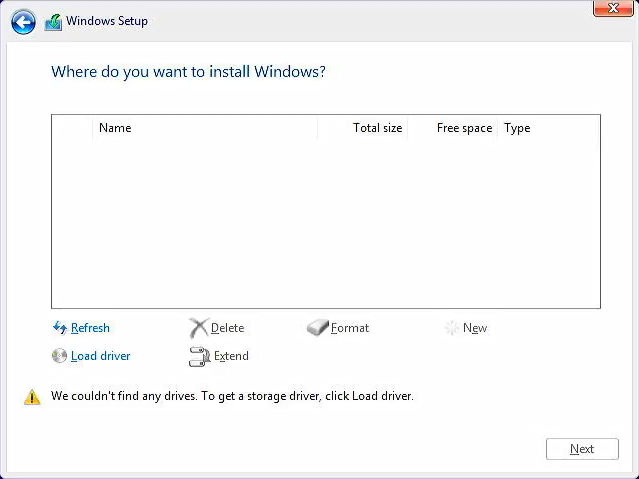
If you experience that Windows cannot find drives when installing Windows 11/10, please try to load the relevant drivers during the Windows installation process.
For the Intel CPU platform, you need to manually install Intel Rapid Storage Technology (IRST) driver during the Windows installation process. You can also refer to the Intel document of How to Configure RAID or Intel Optane Memory with Intel RST on an Intel VMD Capable Platform.
The Ultimate Guide to Installing Windows 11 from a USB drive
Manually install Intel Rapid Storage Technology (IRST) driver
Download Intel Rapid Storage Technology (IRST) driver:
1. Please download Intel Rapid Storage Technology (IRST) driver, Download Link.
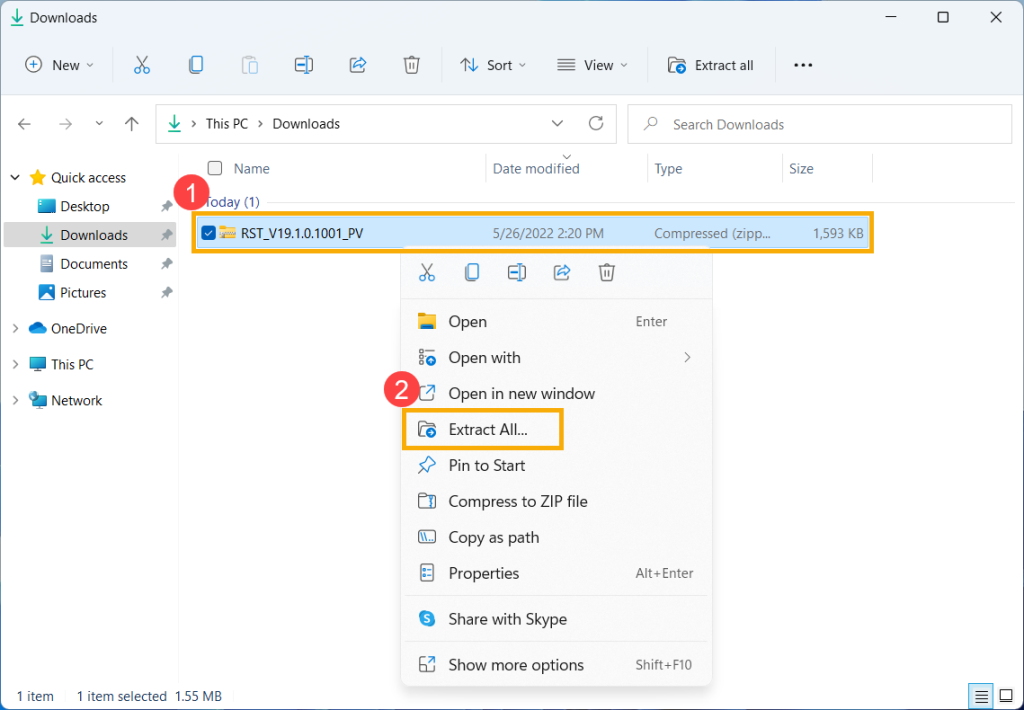
2. After downloading the driver, right-click [RST_V19.1.0.1001_PV] compressed file① and select [Extract All]②.
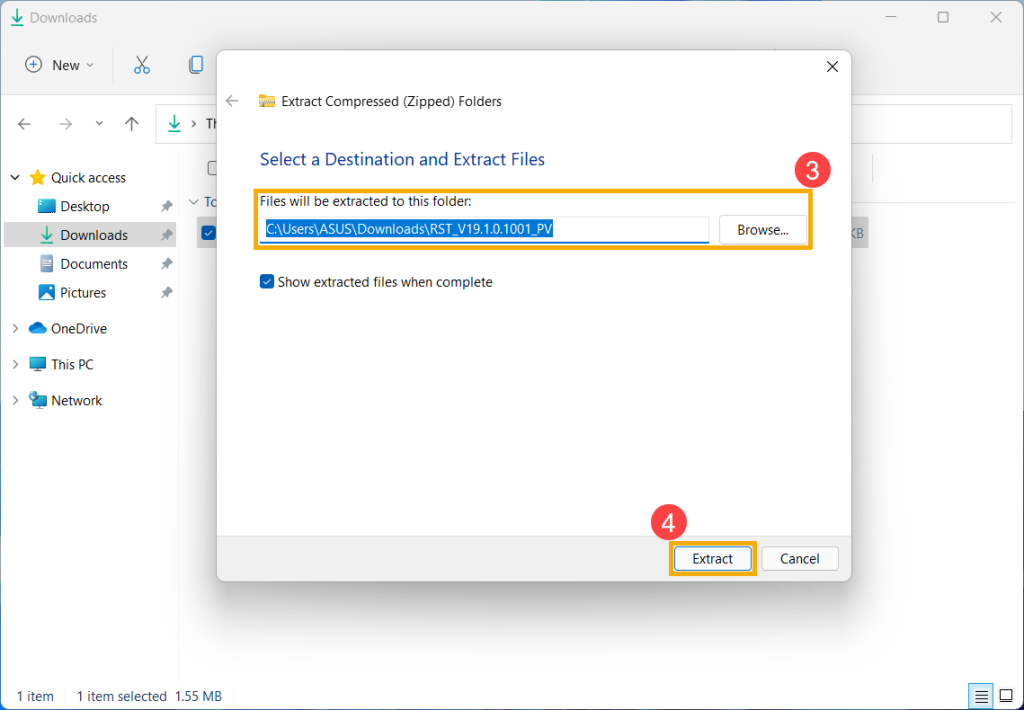
3. Select a Destination③ and click [Extract]④.
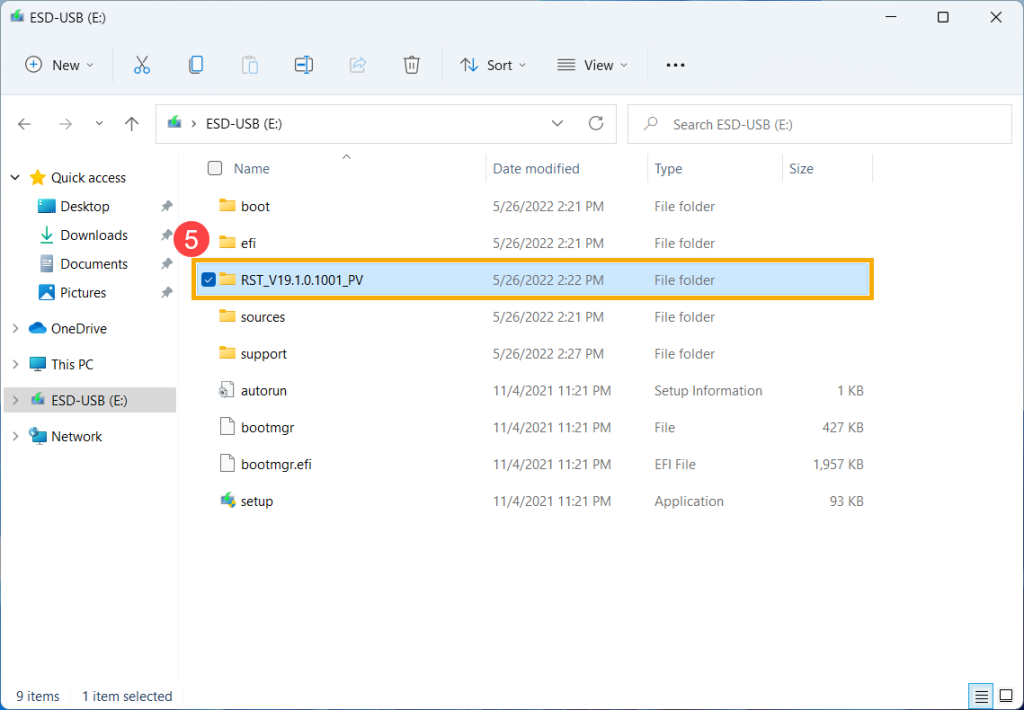
4. After the extraction is completed, please copy the entire folder (RST_V19.1.0.1001_PV) to a USB flash drive⑤.
If you used a USB flash drive to create the Windows 11/10 installation media as well, please copy the entire folder to the same USB flash drive which is created as the Windows 11/10 installation media.
Install Intel Rapid Storage Technology (IRST) driver
1. Connect the USB flash drive which includes the Windows 11/10 installation media and Intel Rapid Storage Technology (IRST) driver (RST_V19.1.0.1001_PV folder) to the target computer. (If you used a DVD to install Windows 11/10, please insert the DVD and consist of the above files USB flash drive to the target computer together.)
2. Restart the Windows 11/10 installation process, here you can learn more about How to use installation media to install Windows 11/10.
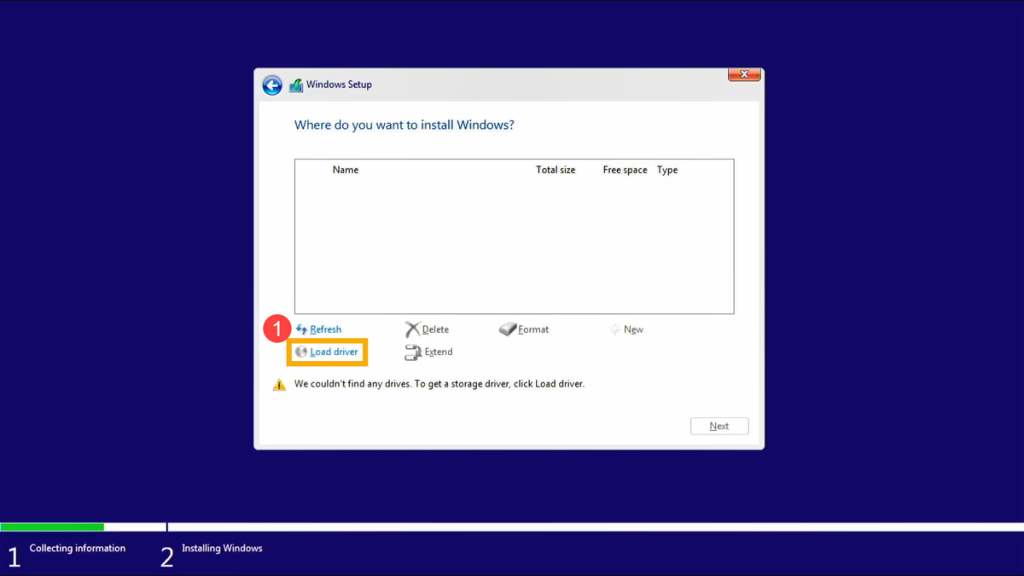
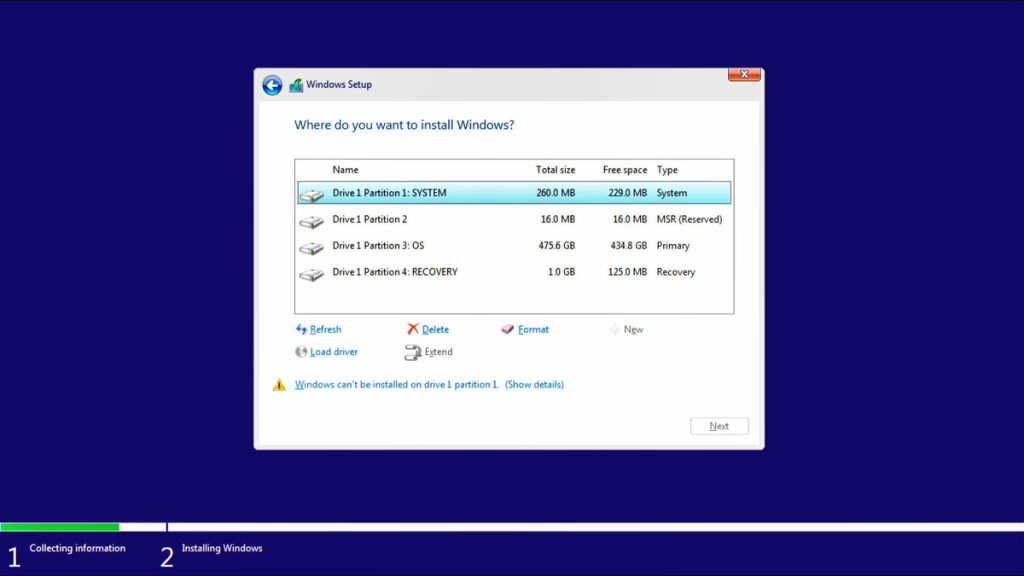
3. On the screen of Where do you want to install Windows and Windows cannot find any drives, please select [Load driver]①.
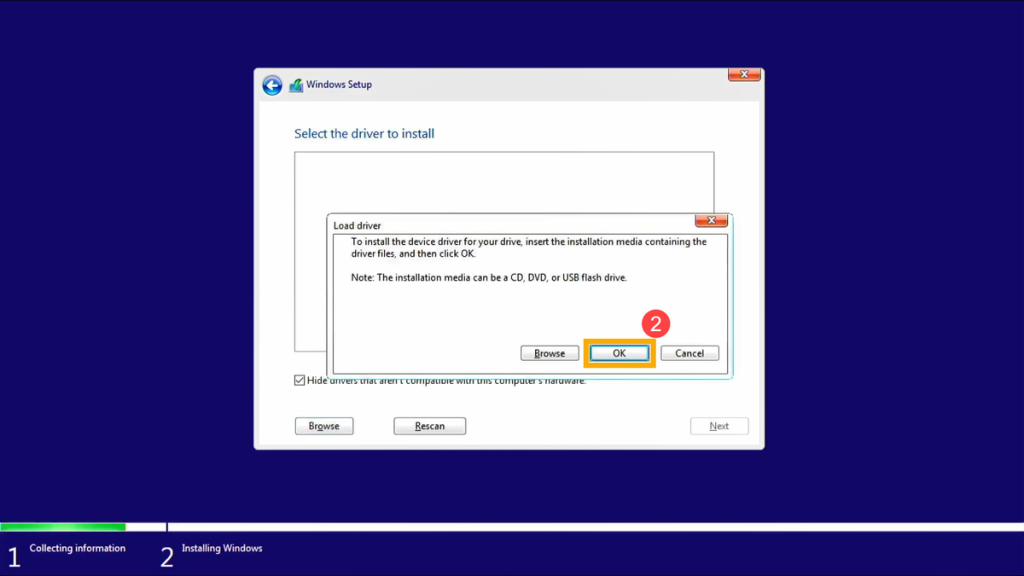
4. Select [OK]②.
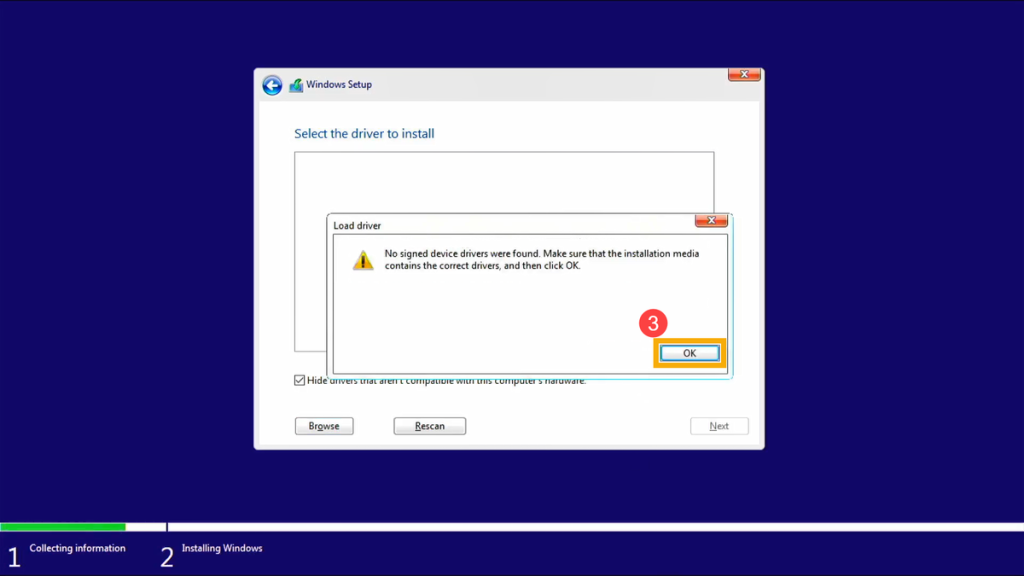
5. Click [OK]③.
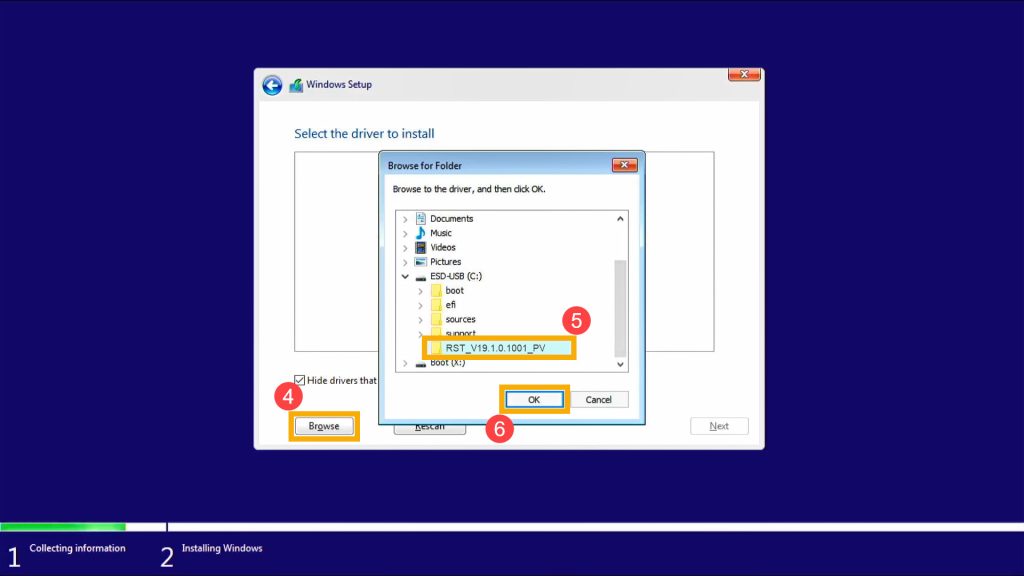
6. Select [Browse]④, then find the [RST_V19.1.0.1001_PV] folder⑤ and select [OK]⑥.
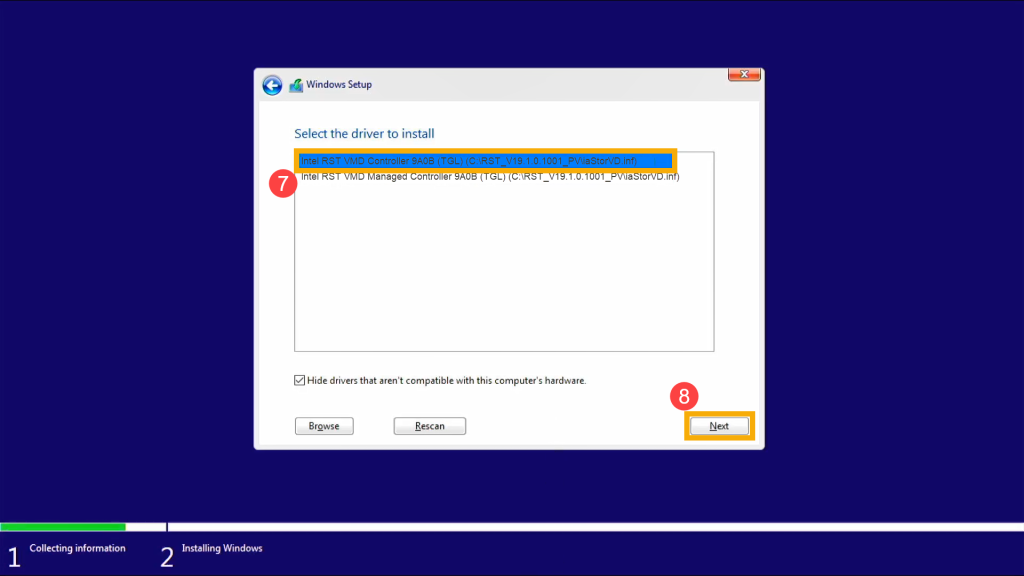
7. Select [Intel RST VMD Controller 9A08 (TGL) ]⑦, then select [Next]⑧ to install the driver.
8. After the driver installation is completed, the drives will appear normally.
If the above method can’t resolve the problem, you can refer to Disable Intel Volume Management Device (VMD) technology to finish the Windows installation process.
Windows 11: How to Create a Bootable USB Drive 3 Ways
Disable Intel Volume Management Device (VMD) technology
1. Firstly, the computer needs to enter BIOS configuration. While the computer isn’t powered on yet, press and hold the F2 button of the keyboard, and then press the Power button to enter the BIOS configuration.
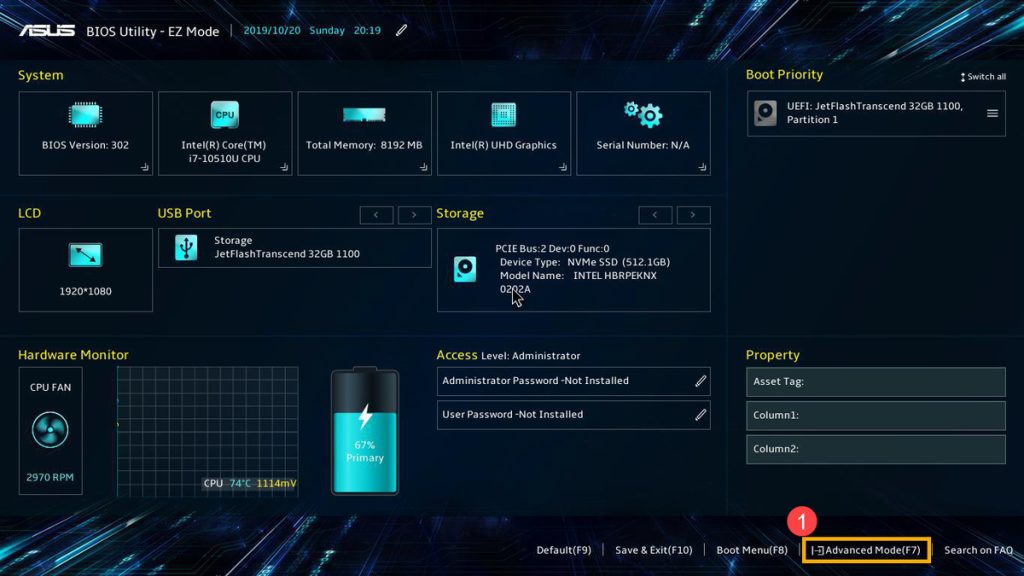
2. After entering the BIOS configuration, press Hotkey[F7], or use the cursor to click [Advanced Mode]① that the screen displayed.
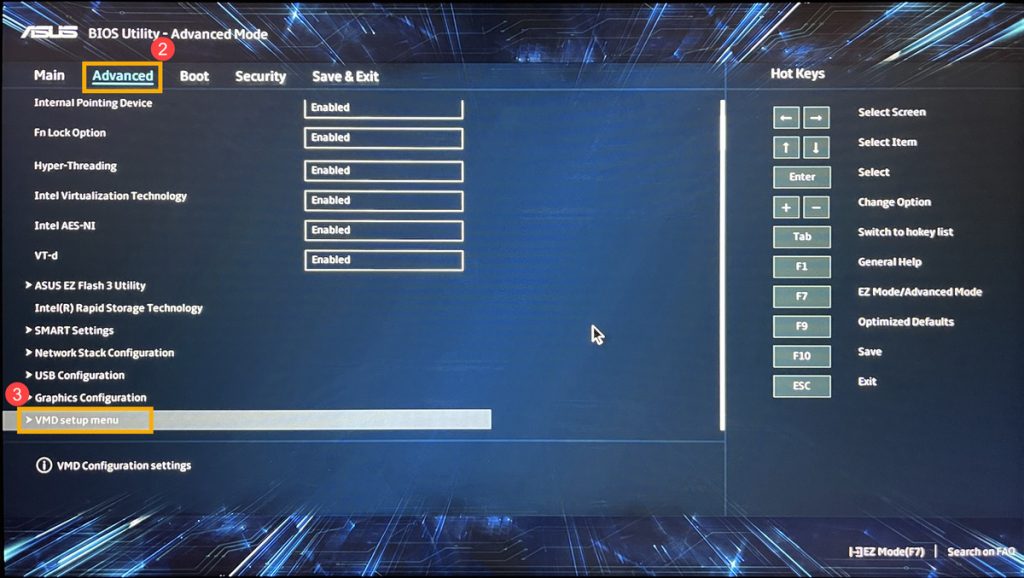
3. Go to [Advanced]② screen, and then select [VMD setup menu]③.
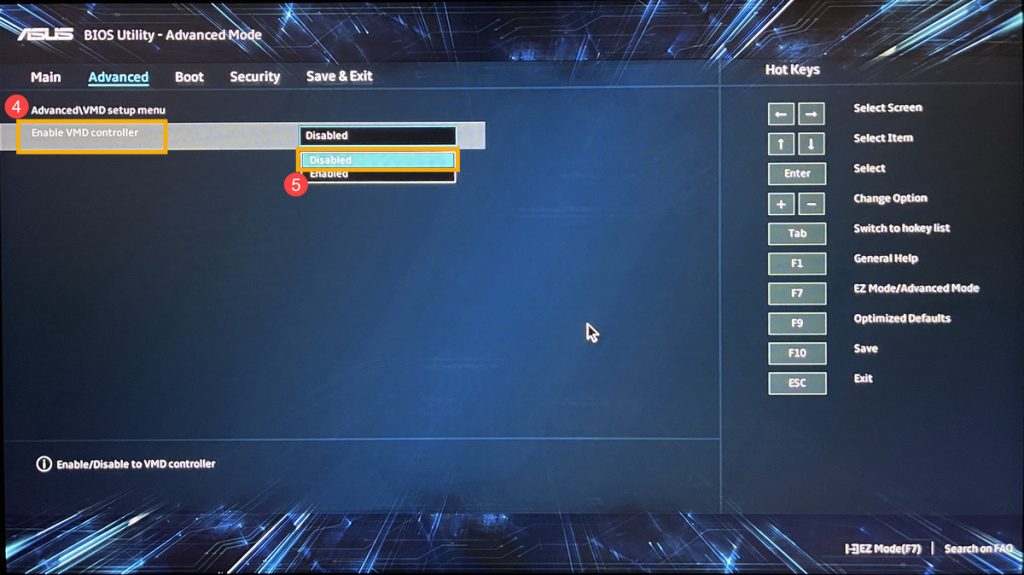
4. Select [Enable VMD controller]④, and then select [Disabled]⑤.
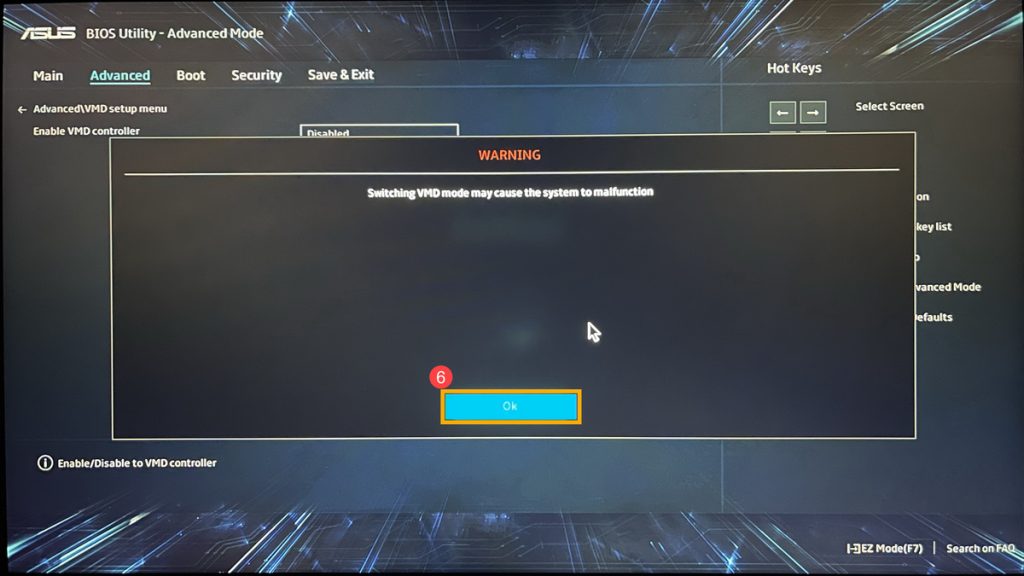
5. Click [Ok]⑥ to disable Intel Volume Management Device (VMD) technology.
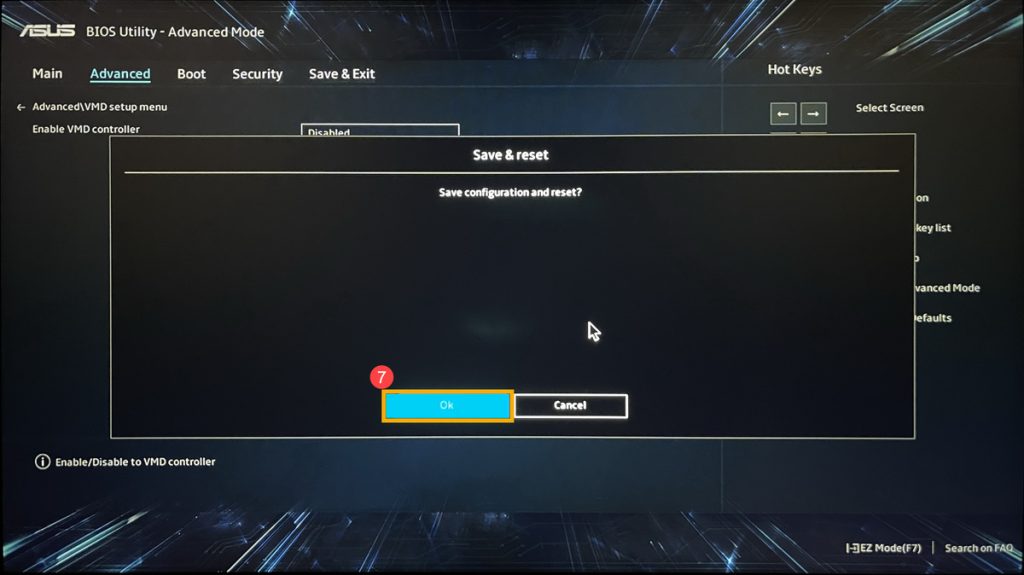
6. Save & Exit Setup. Press Hotkey[F10] and select [Ok]⑦, the computer will restart. After that, you will be able to find drives on this PC when installing Windows 11/10.
If your problem is not worked out with above solution and information, please contact ASUS customer service center for further information.
